To fix a powertrain malfunction, you’ll first connect an OBD-II scanner to retrieve diagnostic trouble codes that pinpoint the problem’s location. Next, you’ll test critical components like sensors, fluid levels, and mechanical parts based on those codes. Once you’ve identified the faulty part, you’ll repair wiring connections or replace damaged components, then complete a 10–15 minute test drive under varied conditions to confirm the fix worked. The following sections break down each diagnostic step, component test, and verification method you’ll need to restore your vehicle’s performance.
Quick Tips
- Connect an OBD-II scanner to retrieve diagnostic trouble codes, then interpret the codes to identify specific powertrain system failures.
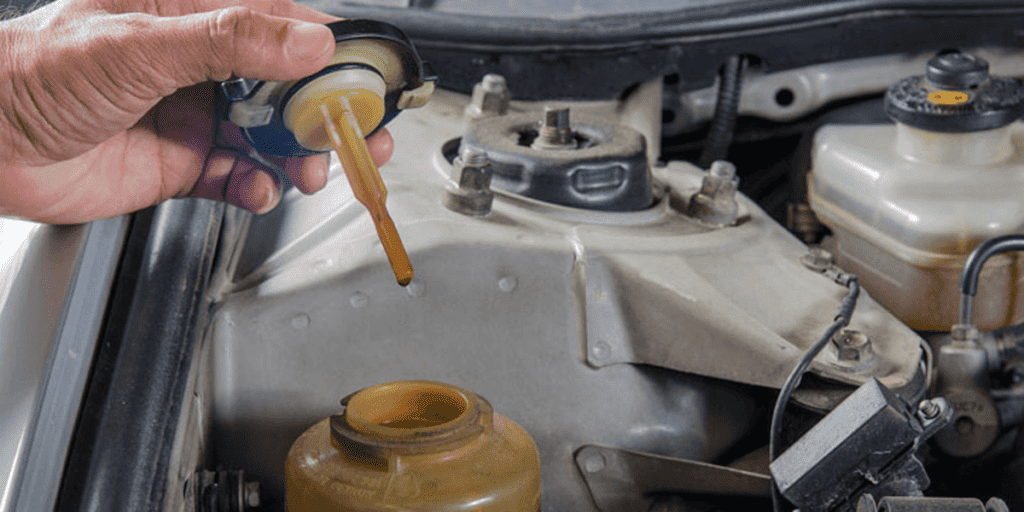
- Check fluid levels and condition, inspect for leaks, and verify battery voltage is at least 12.4 volts before repairs.
- Replace faulty sensors, repair damaged wiring, or address mechanical wear based on diagnostic code analysis and visual inspection findings.
- Perform a 10–15 minute test drive after repairs to confirm the fix and monitor for reilluminated warning lights.
- Clear diagnostic codes from the ECU memory and schedule regular inspections to prevent future powertrain malfunctions.
Identify Warning Signs and Symptoms of Powertrain Problems

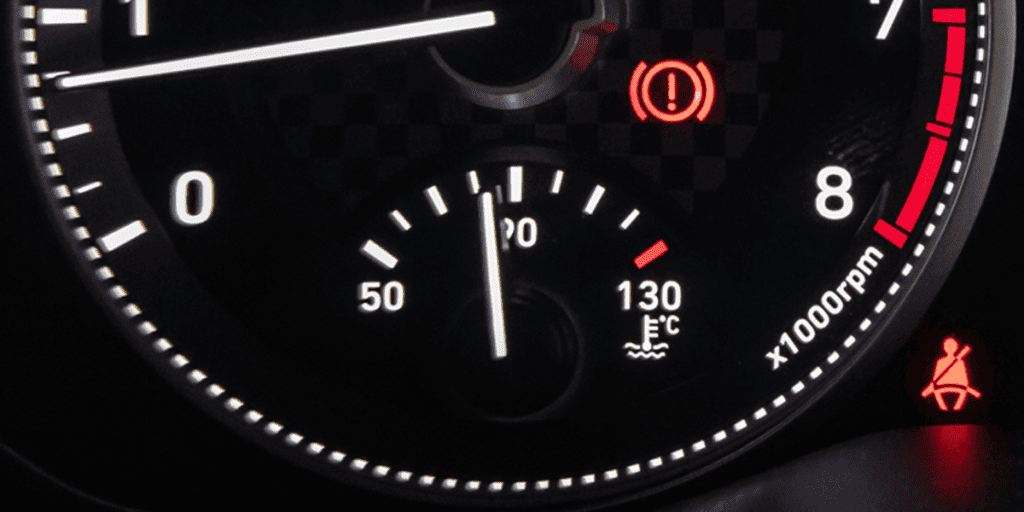
When your vehicle’s powertrain begins to fail, it’ll communicate the problem through a series of distinct warning signs that you shouldn’t ignore.
Dashboard warning lights indicate immediate attention is needed, while unusual grinding, whining, or clicking noises signal mechanical failure.
You’ll notice excessive vibrations, reduced acceleration, or difficulty maintaining speed.
Burning odors and overheating gauges warn of fluid problems that can cause permanent damage if left unaddressed.
Shifting problems between gears often point to transmission issues that require immediate diagnostic attention.
A seized or locked engine can present similarly, so check for signs of engine lock-up if starting or cranking problems occur.
Understand What Causes Powertrain Malfunctions
Recognizing the warning signs is only half the battle—understanding what actually triggers these powertrain malfunctions helps you prevent them and make informed repair decisions. Powertrain problems stem from five main sources: mechanical wear on clutches and engine components, low or contaminated fluids, faulty sensors affecting modern vehicles, engine-specific issues like misfires, and inadequate maintenance practices that accelerate component deterioration. The differential splits power between your wheels and allows them to rotate at different speeds, which is why differential problems often manifest as whining noises or handling issues during turns. Regular electrical inspections can catch failures in protective components like fusible links before they cause broader powertrain damage.
Run Initial Diagnostics Using OBD-II Scanner

Running an initial diagnostic with an OBD-II scanner is your first step in pinpointing what’s causing the powertrain malfunction.
You’ll need to locate the OBD-II port under your dashboard, plug in the scanner, and retrieve the diagnostic trouble codes (DTCs) stored in your vehicle’s computer.
Once you’ve pulled these codes, interpreting them correctly will reveal whether you’re dealing with issues like misfires, fuel system problems, or catalytic converter efficiency failures.
Measure the vehicle’s electrical system voltage to ensure it’s at least 12.4 volts before relying on scan results, as low battery voltage can produce misleading codes or prevent accurate diagnostics.
Locate OBD-II Port
Before you can pull diagnostic codes from your vehicle’s computer, you’ll need to track down the OBD-II port—a standardized 16-pin trapezoidal connector that serves as the gateway to your powertrain’s electronic brain.
In most vehicles, you’ll find it under the dashboard on the driver’s side, typically within two feet of the steering wheel. Check behind trim panels or beneath the steering column if it’s not immediately visible.
Retrieve Diagnostic Trouble Codes
Connect your OBD-II scanner to the port with the vehicle’s ignition turned to the “ON” position—you don’t need to start the engine yet, though some vehicles and scanners may require it for full system access.
Once the scanner powers on and initializes, proceed to the diagnostic menu and select “Read Codes” or “Retrieve DTCs.”
The scanner will display stored and pending trouble codes, which identify specific powertrain faults requiring attention.
Interpret Error Code Results
Once you’ve pulled the diagnostic trouble codes from your vehicle’s computer, breaking down what they mean becomes your next critical step.
Each code’s letter identifies the affected system—P for powertrain, B for body, C for chassis, U for network—while the numbers pinpoint the specific fault. Cross-reference codes with your vehicle’s make and model using your scanner’s database or online resources to determine the exact component or circuit causing the malfunction.
Test Critical Powertrain Components

Diagnosing a powertrain malfunction requires systematic testing of each major component to isolate the source of failure.
Start by measuring your electric motor’s torque delivery and efficiency across operating speeds.
Next, evaluate transmission shift quality and gear durability under load.
Test your battery’s charging cycles and thermal stability.
Finally, validate your inverter’s power conversion efficiency and response time to pinpoint the defective component.
The fuel delivery system should also be checked, including testing the fuel pump control module and fuel pressure to ensure proper operation.
Execute Necessary Repairs and Replacements
After identifying the faulty component through systematic testing, you’ll need to determine whether repair or replacement makes the most financial and practical sense for your specific situation. Minor issues like software glitches benefit from cost-effective reprogramming, while extensive damage from water intrusion requires full replacement.
Experienced technicians assess damage severity, repair wiring connections, replace faulty sensors, and address component failures systematically to restore peak performance.
Verify Repairs Through Testing and Monitoring

After you’ve completed all necessary repairs and replacements on your powertrain system, you’ll need to clear the diagnostic trouble codes from the ECU’s memory using a scan tool, which resets the check engine light and establishes a baseline for post-repair monitoring.
Once codes are cleared, you should perform a thorough test drive that replicates the conditions under which the original malfunction occurred—including various speeds, loads, and driving scenarios—to confirm the powertrain operates without issues.
Throughout the test drive and during subsequent vehicle operation, you must monitor the dashboard warning lights closely, as any reillumination of the check engine light or powertrain malfunction indicator suggests either an incomplete repair or the presence of additional underlying problems requiring further diagnosis.
Clear Codes and Test Drive
Once you’ve wrapped up the repair work on your powertrain system, clearing the diagnostic trouble codes (DTCs) and conducting a proper test drive becomes essential to verify that your fixes actually solved the problem.
Connect your OBD-II scanner, turn the ignition on without starting the engine, and select “Erase DTCs.” After clearing codes, drive for 10-15 minutes under normal conditions, mixing city and highway speeds to trigger system monitors and confirm repairs.
Monitor Warning Lights Closely
Vigilantly watching your dashboard after completing powertrain repairs gives you immediate feedback about whether your fixes actually worked.
If the check engine light, wrench icon, or service engine soon indicator reappears, you’ll know additional diagnostics are necessary.
Multiple warning lights illuminating simultaneously suggest unresolved system failures.
Clear dashboard displays confirm your transmission fluid refills, spark plug replacements, and coolant system repairs successfully eliminated the malfunction.
Implement Preventive Maintenance Practices
Implementing a structured preventive maintenance program stands as one of the most effective strategies for avoiding powertrain malfunctions and extending vehicle lifespan.
You’ll achieve 12–18% cost savings compared to reactive repairs while reducing unexpected breakdowns.
Schedule regular inspections, maintain proper fluid levels, and replace filters according to manufacturer specifications.
Fleet management software can automate scheduling notifications, ensuring you don’t miss critical maintenance intervals that protect your powertrain components.
Wrapping Up
Fixing powertrain malfunctions requires systematic diagnosis and precise repairs. You’ve learned to recognize symptoms, use an OBD-II scanner effectively, and test components methodically. Once you’ve completed repairs, you’ll need to verify everything works correctly through road testing and monitoring. Don’t forget that regular maintenance prevents most issues before they start. If you’re uncomfortable with complex repairs, consult a certified mechanic who can guarantee your vehicle’s powertrain operates safely and efficiently.