Your gear shift indicator light failure typically stems from burnt-out bulbs, faulty wiring connections, or defective position sensors that prevent proper transmission display. Start by visually inspecting the dashboard components, then check bulb condition and test wiring connections using a multimeter for voltage and continuity issues. If basic bulb replacement and fuse checks don’t resolve the problem, you’ll need to examine the gear shift switch itself and surrounding electrical circuits. The thorough diagnostic process below reveals advanced troubleshooting techniques.
Quick Tips
- Check for burnt-out bulbs or damaged LEDs in the dashboard indicator display first.
- Test wiring connections and gear shift switch using a multimeter for voltage and continuity.
- Inspect the park/neutral position switch as it commonly causes gear indicator malfunctions.
- Replace damaged wiring sections with proper soldering and heat shrink tubing protection.
- Seek professional help if basic bulb/fuse replacement fails or transmission warning lights activate.
Signs Your Gear Shift Indicator Light Has Failed
Several telltale signs indicate your gear shift indicator light has failed, and recognizing these symptoms early can prevent more serious automotive problems.
You’ll notice complete non-illumination, where the light doesn’t turn on at all.
Erratic flashing or random illumination when it should remain off signals sensor faults.
Additionally, incorrect gear displays mislead you about actual transmission position. A faulty park/neutral position switch on the transmission commonly causes these indicator light malfunctions. This issue can lead to total brake failure, further complicating vehicle operation.
Understanding What Causes Indicator Light Malfunctions
When your gear shift indicator light stops working properly, understanding the root causes helps you diagnose the problem more effectively and communicate clearly with mechanics.
Common culprits include faulty wiring connections, defective gear shift switches, and failed position sensors. Regular maintenance schedules can help prevent these issues from arising in the first place. Burnt-out bulbs or damaged LEDs also cause malfunctions, while control module failures can disrupt entire indicator systems completely. A malfunctioning gear position sensor can also prevent your vehicle from starting properly if the computer cannot determine whether the transmission is in Park or Neutral.
Essential Tools and Safety Preparations
Before attempting any gear shift indicator light repair, you’ll need to gather the right tools and take proper safety measures to protect yourself and your vehicle.
Essential tools include a socket set, screwdrivers, and dash removal tools.
Safety preparations involve chocking wheels, disconnecting the battery, and wearing protective gear like gloves and safety glasses. Additionally, ensure that the charging system is functioning properly to avoid electrical issues during repairs.
Step-by-Step Diagnostic Process
When diagnosing a malfunctioning gear shift indicator light, you’ll need to follow a systematic approach that starts with what you can see and progresses to more complex electrical testing.
Begin with a thorough visual inspection of the dashboard, bulb, and surrounding components since many indicator problems stem from simple issues like burned-out bulbs, loose connections, or moisture intrusion.
If the visual check doesn’t reveal the problem, you’ll then move to electrical testing methods using a multimeter to check voltage, continuity, and ground connections throughout the indicator circuit. Additionally, inspecting battery connections and terminals can help identify power flow disruptions that may impact the indicator’s functionality.
Visual Inspection First
Although troubleshooting electrical issues can seem intimidating, starting with a systematic visual inspection will help you identify the most common causes of gear shift indicator light problems without immediately reaching for diagnostic tools.
Begin by checking the indicator bulb for burn-out, examining wiring connections for corrosion, and inspecting the dashboard panel for damage.
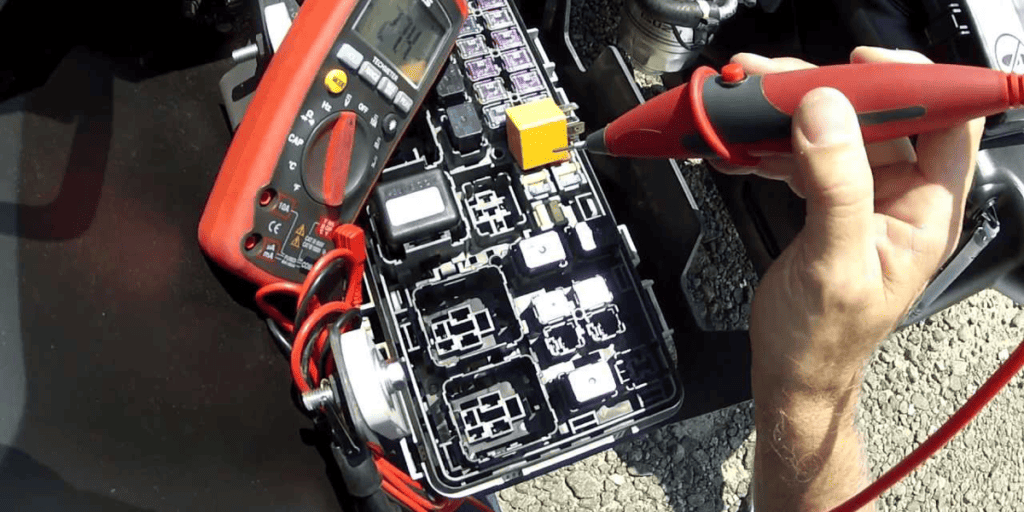
Electrical Testing Methods
Once you’ve completed your visual inspection and identified potential problem areas, you’ll need to move into systematic electrical testing to pinpoint the exact cause of your gear shift indicator light malfunction.
Start by using a multimeter to verify circuit continuity, checking for open or short circuits in the wiring assembly connections that supply power to your indicator system.
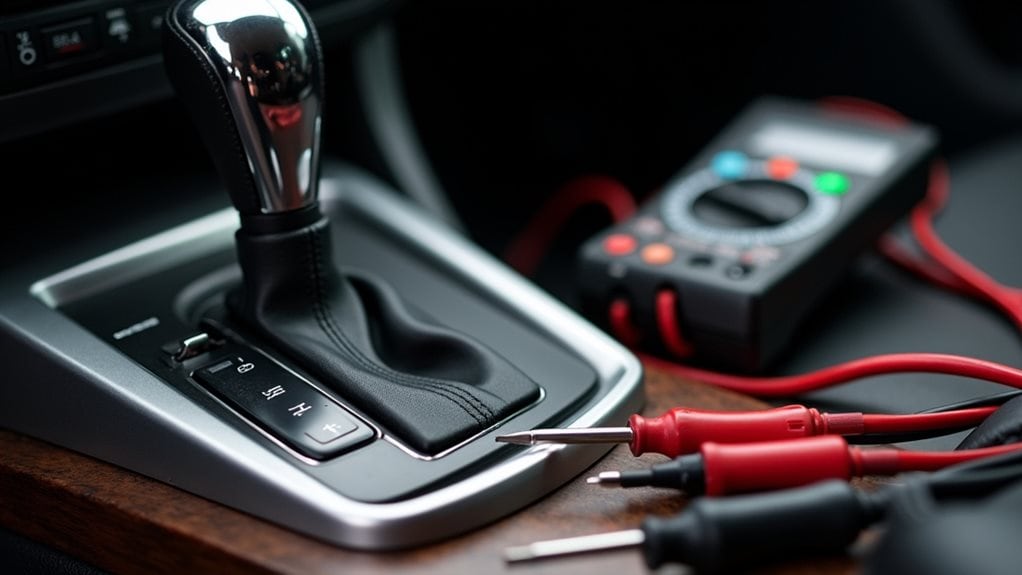
Testing the Gear Shift Indicator Switch
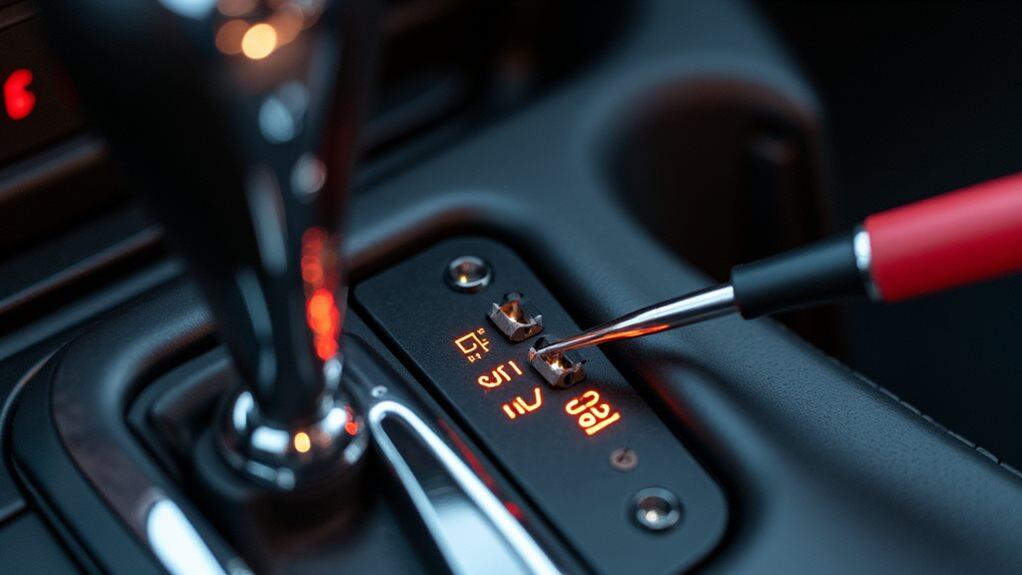
Three essential steps form the foundation of effective gear shift indicator switch testing, each building upon the previous to guarantee accurate diagnosis of your vehicle’s transmission position sensing system.
First, you’ll test continuity across switch terminals while moving the gear lever through each position.
Next, verify proper voltage supply reaches the switch circuit.
Finally, confirm stable ground connections.
Inspecting Wiring and Electrical Connections
After testing the gear shift indicator switch, you’ll need to examine the wiring assembly connections that link the switch to the dashboard indicator light.
Start by visually inspecting all wire connections near the gear shift area, looking for loose connectors, frayed wires, or corrosion that could interrupt the electrical signal.
Use a multimeter to test electrical continuity through each wire, ensuring that power flows properly from the switch through the assembly to the indicator light circuit.
Check Wiring Harness Connections
Several key areas demand your attention when inspecting the wiring assembly connections for your gear shift indicator light system.
Examine the gear shift indicator switch and nearby wiring junctions for loose connections or visible damage.
Check connector terminals for corrosion, bent pins, or oxidation that disrupts electrical flow.
Verify all connectors are fully seated and locked securely.
Test Electrical Continuity
Once you’ve verified the physical connections in your wiring assembly, testing electrical continuity becomes the next logical step to identify hidden circuit problems that visual inspection can’t reveal.
Disconnect all power sources first, then set your digital multimeter to continuity mode. Touch probes to circuit endpoints—a steady beep confirms proper connection.
Checking Fuses and Relays in the Circuit

When your gear shift indicator light malfunctions, the electrical circuit’s fuses and relays represent the most logical starting point for diagnosis.
First, locate the driver’s side fuse box behind the dashboard. Remove relevant fuses and inspect for broken filaments or discoloration.
Test each fuse’s continuity with a multimeter, then examine relays for corrosion or damage.
Replacing a Faulty Gear Shift Indicator Switch
When you’ve confirmed that a faulty gear shift indicator switch is causing your dashboard display problems, you’ll need to carefully remove the old component and install a replacement unit.
The switch removal process requires disconnecting your vehicle’s battery for safety, then accessing the switch by removing dashboard panels or steering column covers depending on your specific vehicle model.
After installing the new switch and reconnecting all wiring assemblies, you must test the system thoroughly by shifting through all gears to verify that the indicator accurately displays your selected gear position.
Switch Removal Process
Begin the gear shift indicator switch removal process by gathering your essential tools and preparing your workspace for safe electrical work.
First, disconnect your vehicle’s battery to prevent electrical shorts.
Remove surrounding panels and trim pieces to access the switch location.
Carefully disconnect electrical connectors, noting their orientation, then unscrew mounting bolts securing the switch assembly.
Installation and Testing
With the old switch removed from your vehicle, you’re ready to install the replacement gear shift indicator switch and verify proper operation.
Connect the black wire to ground and red wire to ignition-switched 12V power. Test all connections using a multimeter for continuity.
Program each gear position by holding the programming button while selecting gears sequentially.
Repairing Damaged Wiring Connections
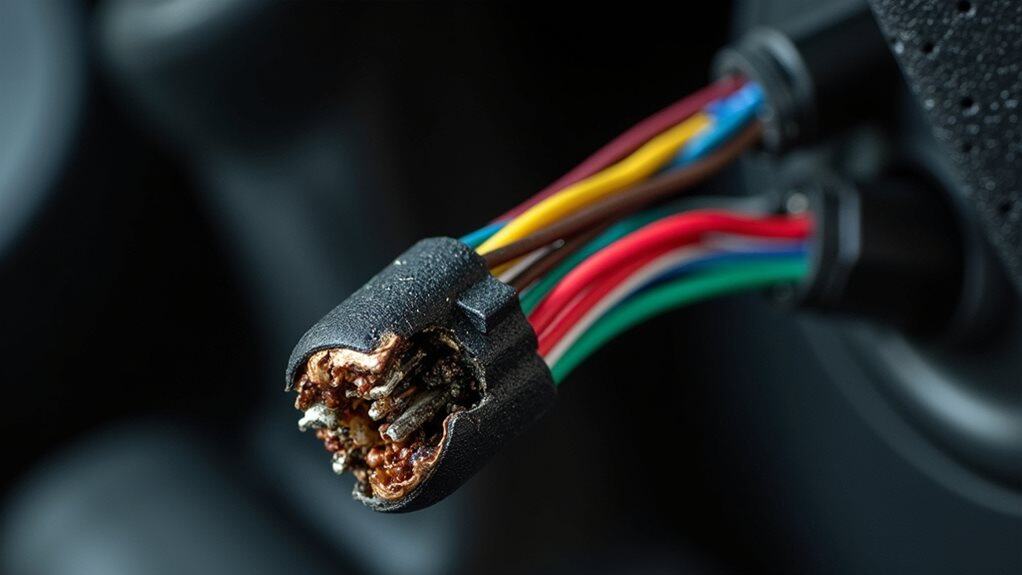
Although gear shift indicator lights seem like simple components, their wiring systems can develop complex problems that require systematic diagnosis and careful repair techniques.
You’ll need to inspect cables for damage, test continuity with a multimeter, and secure all ground connections.
Cut damaged sections cleanly, solder joints properly, and protect repairs with heat shrink tubing.
Preventive Maintenance for Long-Term Reliability
Once you’ve successfully repaired any damaged wiring connections, implementing an extensive preventive maintenance strategy will greatly extend your gear shift indicator system’s operational lifespan.
Regularly inspect transmission fluid levels and replace filters according to manufacturer specifications. Test sensors periodically using diagnostic scan tools to detect error codes early. Monitor wiring assemblies for corrosion or fraying signs consistently.
Recognizing When Professional Assistance Is Required

When should you acknowledge that your gear shift indicator light problem exceeds your DIY repair capabilities?
If bulb replacement and fuse checks haven’t resolved the issue, you’ll need professional diagnostic tools.
Visible corrosion or burn marks on electrical components, erratic indicator behavior, and transmission warning lights require specialized equipment.
Certified mechanics guarantee proper calibration and safety standards.
Wrapping Up
You’ve now learned to diagnose and repair gear shift indicator light problems systematically. By following proper safety procedures, testing components methodically, and replacing faulty parts correctly, you’ll restore your vehicle’s functionality. Remember that consistent maintenance prevents future failures, while knowing your limits guarantees you’ll seek professional help when necessary. With these skills, you can confidently tackle most indicator light issues and keep your transmission system operating reliably for years ahead.