
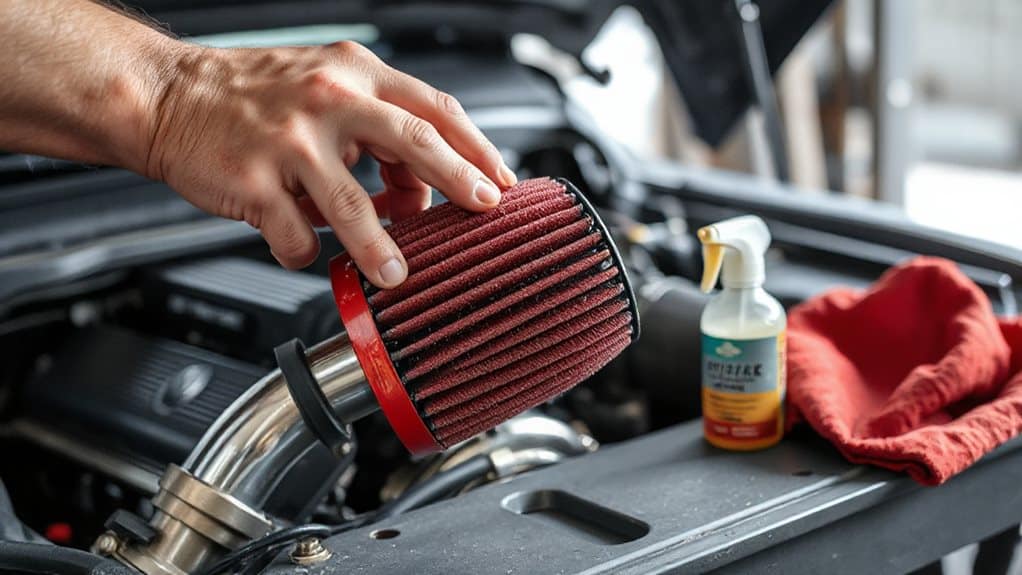
You’ll need a flat‑head screwdriver, the Spectre cleaning kit (HPR4820 or 884820), a blower, lukewarm water, and filter oil. Loosen the hose clamps just enough to slide the filter out while keeping the clamps partially engaged so it won’t drop. Tap the black rim against a trash‑can edge to dislodge surface dust, then blow from the inner side with a soft nozzle to expel loose debris. Spray the Spectre cleaner evenly, let it soak 10–12 minutes, and rinse from inside out with low‑pressure water until it runs clear. Air‑dry the filter for about 12 hours in a well‑ventilated area, avoiding heat, then apply filter oil from three inches away, let it wick 20 minutes, and touch up for a uniform red color before reinstalling and setting a maintenance schedule, which you’ll discover more about if you continue.
Quick Tips
- Loosen hose clamps just enough to slide the filter out, keeping clamps partially engaged to avoid damage.
- Tap the filter rim gently on a trash‑can edge to dislodge surface debris, then use a blower to expel interior particles.
- Apply Spectre cleaner evenly, let it dwell 10–12 minutes, then rinse from inside out with low‑pressure lukewarm water until clear.
- Air‑dry the filter for about 12 hours in a well‑ventilated area, avoiding heat sources, before oiling.
- Spray Spectre filter oil from 3 inches away, let it wick 20 minutes, then touch up for a uniform red color before re‑installing.
Clean and Reinstall the Spectre Air Filter
How do you begin cleaning and reinstalling the Spectre air filter? Loosen the hose clamps with a flat‑head screwdriver, then slide the intake tube off the filter. Tap the filter gently on a trash‑can rim to dislodge loose dirt, and, if desired, use a blower to push out debris. Avoid harsh bangs that could damage the media. For oily or greasy filters, degrease the surface first with a suitable cleaner to ensure proper cleaning and adhesion of any re‑oiling products (degreasing is necessary).
Gather the Right Tools and Cleaning Supplies
Before you start, make sure you have the official Spectre cleaning kit—either the HPR4820 or the 884820 version—because both include the exact 12‑ounce cleaner and 8‑ounce oil you’ll need, and the spray‑top bottles let you apply the fluid precisely without splashing.
Also gather a flathead screwdriver, paper towels, a gentle hose for rinsing, and, if you prefer, compatible K&N cleaner and oil.
Ensure each item is within reach before beginning. Tri-wing screws are often used in electronics to provide a tamper-resistant fastening, so consider whether your filter or housing uses them before choosing your screwdriver.
Loosen and Remove the Filter Without Damage
You’ll start by loosening the hose‑clamp screws with a flat‑head screwdriver just enough to let the filter slide out, keeping the clamp partially engaged so it won’t fall off.
Then give the rim a gentle tap against a trash can to shake loose debris, avoiding hard bangs that could crush the pleats. Always handle the pleats carefully to prevent damage to the filter media which can reduce filtration efficiency.
Finally, when you reinstall, align the boot and press the filter firmly into place, tightening the clamps just enough to hold it securely without over‑tightening.
Ensure the vehicle is in park before beginning the removal.
Screwdriver‑Free Clamp Loosening
Ever wondered how to release a hose clamp without a screwdriver and still keep the filter intact? Turn the flat‑head screw just a half‑turn with your fingers, enough to loosen the ring but not detach it.
Repeat on the opposite side, then slide the clamp off using gentle hand pressure.
Verify the clamp moves freely before pulling the filter, and inspect for deformation afterward.
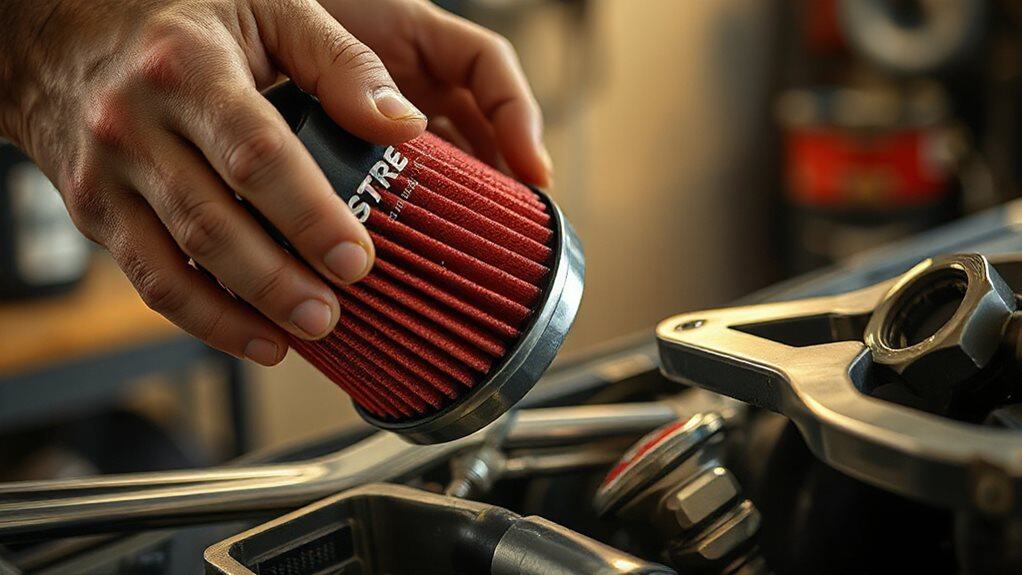
Gentle Rim Tap Technique
What you need to know first is that the rim on a Spectre conical filter is purpose‑designed for gentle tapping, so you can loosen and remove the filter without harming its delicate pleats. Identify the black rim, place it on a firm, non‑sharp trashcan edge, and tap lightly with your fingertips. Multiple soft taps dislodge surface dust, while the flexible rim protects the pleats. Inspect for cracks before proceeding.
Secure Re‑Fit Without Over‑Tightening
After the gentle rim tap loosens surface dust, the next step is to secure the filter during re‑fit without over‑tightening, which protects both the pleats and the surrounding clamps.
Loosen each hose clamp just enough with a flathead screwdriver to slide the filter out, then line up the boot, pop the filter back in, and tighten clamps evenly.
Verify snugness—no excessive force—by checking that all clamps hold firmly but can still be turned slightly with a screwdriver.
Initial Debris Removal: Tap and Blow Out Loose Dirt
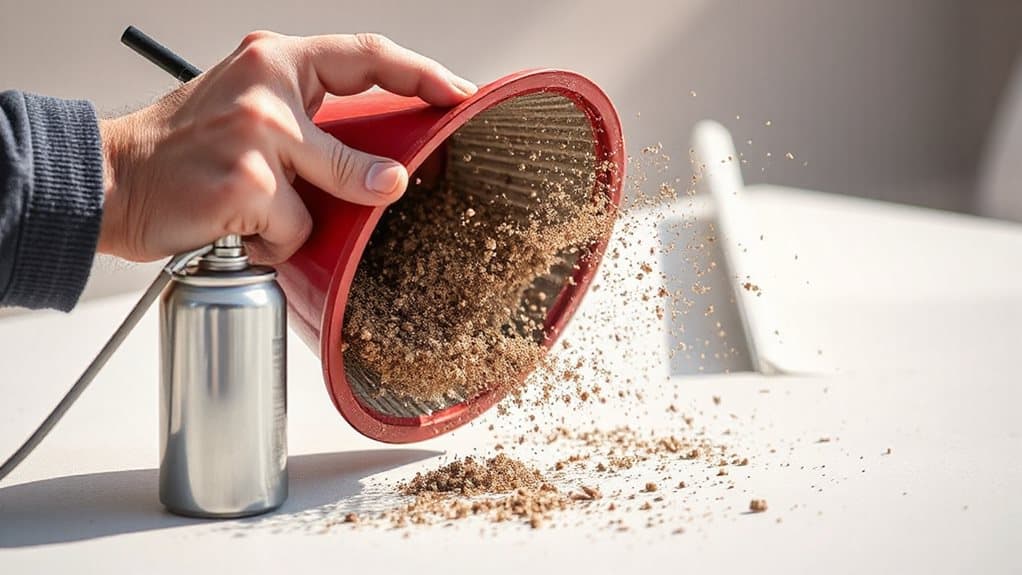
You’ll start by gently tapping the black rim of the filter against a trash‑can edge, which dislodges the larger, visible particles without damaging the media. Then, using a blower, you direct a focused stream of air inward to push the loosened debris out of the interior, ensuring that even fine dust is expelled. This two‑step approach—soft tapping followed by precise blowing—prepares the filter for the deeper cleaning stages that follow. Many vehicle owners also use an OBD2 scanner to diagnose related engine issues and confirm proper airflow after cleaning engine diagnostics.
Tap Filter Gently
Ever wondered how to start cleaning a Spectre air filter without risking damage? Hold the black rim firmly, position the filter vertically over a trash can, and tap gently around the perimeter. Use a light, rhythmic motion to dislodge loose dirt without banging. Repeat until no visible particles fall, then inspect for cracks. This initial step clears surface debris while preserving filter integrity.
Blow Out Debris
A few quick blows of compressed air can dislodge the remaining particles that tapping alone missed, and the process works best when the filter is held upright over a trash container. Direct the blower from the inner side, letting the high‑velocity stream push dirt outward. Avoid forceful banging; use a soft nozzle to protect fibers. Perform this outside, containing debris in the trash. This step clears loose particles before any rinsing or vacuuming.
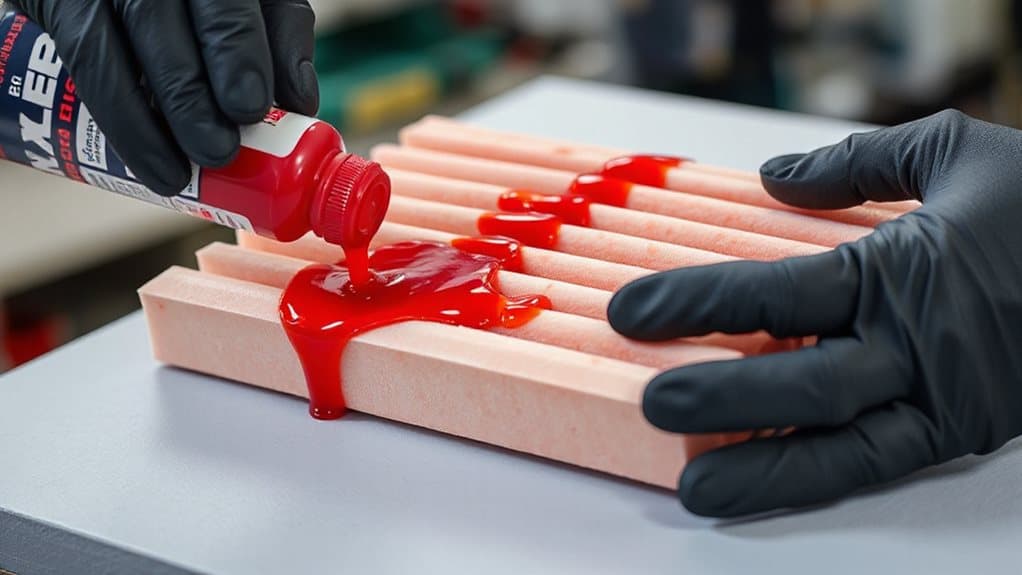
Apply Spectre Cleaner and Let It Soak (10‑12 min)
Spray the Spectre Air Filter Cleaner evenly across the entire filter media, making sure both the outer and inner surfaces become fully saturated. Use the 12‑ounce bottle from the HPR4820 kit, covering every fiber without scrubbing.
Let the solution dwell for ten to twelve minutes; this period dissolves oil and grime, preparing the filter for the next rinse stage. Regular maintenance can prevent airflow restrictions that contribute to blocked condenser coils and reduced system efficiency.
Rinse, Inspect, and Repeat Until Water Runs Clear
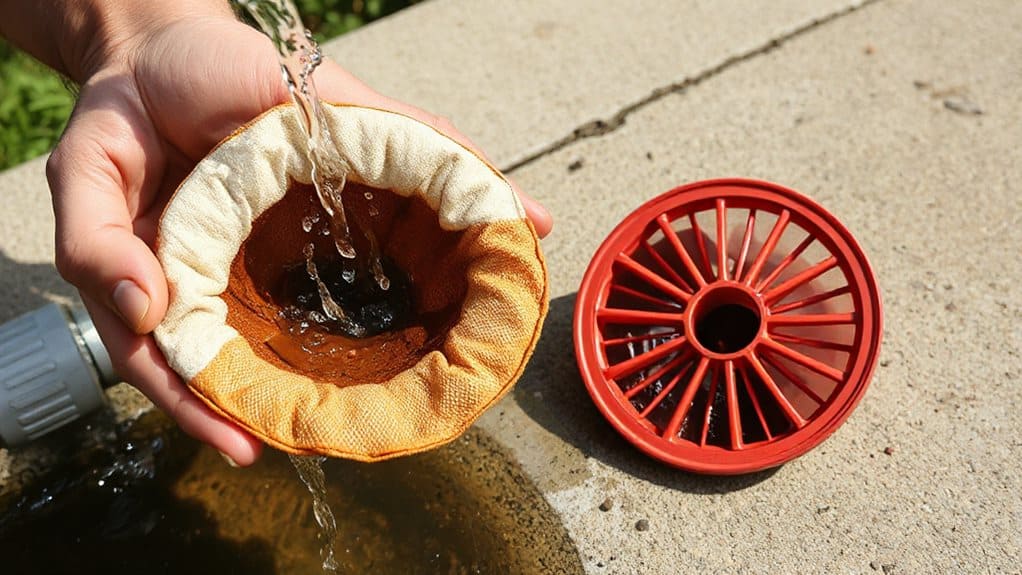
How do you ensure the filter is truly clean before reassembly? Rinse it under lukewarm water, directing flow from inside out with low pressure. Submerge the filter in clear water; watch the color shift to indicate remaining grime. Inspect grooves, pleats, and screen for debris or oil. Repeat rinsing and submerging until water runs clear, re-checking each cycle to confirm no dirt remains. Consider how the vehicle’s payload capacity affects how often heavy-duty filters should be cleaned.
Air‑Dry the Filter Naturally (≈12 hrs) – No Heat
The filter should be left to air‑dry for about twelve hours in a well‑ventilated spot, avoiding any source of heat. Position it upright, shake gently to release excess water, and pat the rubber ring with a paper towel.
Choose a sunny, low‑humidity area; avoid hair dryers, heat guns, or forced‑air devices. Ensure it’s completely dry before reinstalling to prevent mold and performance loss.
Apply Spectre Filter Oil to Protect and Seal
After the filter has air‑dried, the next step is to apply Spectre filter oil, which creates a protective seal and prevents moisture from penetrating the pleated media.
Shake the bottle, work in a ventilated space, and wear goggles.
Spray from three inches away, covering each pleat crown lightly.
Let it wick for twenty minutes, then touch up light spots until the filter turns uniformly red.
Inspect the Filter, Reinstall It, and Set a Maintenance Schedule
Do you know when to inspect, reinstall, and schedule maintenance for your Spectre air filter? Inspect every 7,000 miles or during manufacturer service, especially in dusty conditions; look for clogged screens, warping, or cracks. After cleaning, ensure water runs clear, filter dries completely, and no residue remains. Reinstall, aligning the boot, securing clamps, and confirming airflow arrows. Set a schedule: every 7,000 miles, no more than 25,000 miles without service, and adjust frequency for harsh environments.
Wrapping Up
By following these steps you’ll keep the Spectre air filter operating at peak efficiency. Regularly removing debris, soaking with the approved cleaner, and rinsing until the water runs clear prevent clogging and airflow loss. Air‑drying naturally avoids heat damage, while a thin coat of Spectre filter oil seals the media and extends service life. Reinstall the filter securely, then schedule routine cleanings to maintain optimal indoor air quality and system performance.


