
Put on gloves, goggles, long sleeves and pants, then disconnect the negative battery terminal to stop the pump. Locate the fuel‑pump fuse (15‑20 A) in the fuse box, find the Schrader valve on the fuel rail near the throttle body, and identify the filter cap between tank and pump. Run the engine until it stalls, disable the pump relay, and release rail pressure by removing the Schrader cap and depressing the stem with a screwdriver. Drain the lines into a proper container, check for leaks with a detector solution, verify zero pressure, then reinstall the fuse and relay, prime the system, and start the engine briefly to confirm stability, after which you’ll discover additional details.
Quick Tips
- Wear gloves, goggles, long sleeves, and pants; disconnect the negative battery terminal and keep a fire extinguisher nearby.
- Locate the fuel‑pump fuse (15–20 A) and the Schrader valve on the fuel rail, then disconnect the pump’s electrical connector.
- Run the engine until it stalls, disable the fuel‑pump relay, and let the engine idle to consume remaining fuel and lower line pressure.
- Release rail pressure by removing the Schrader valve cap, depressing the stem with a screwdriver, and directing the spray away from you.
- Drain the fuel lines into a proper container, check for leaks with leak‑detect solution, verify zero pressure, then reinstall fuse and relay and prime the system.
Gather Tools & Safety Gear for Depressurizing Fuel System
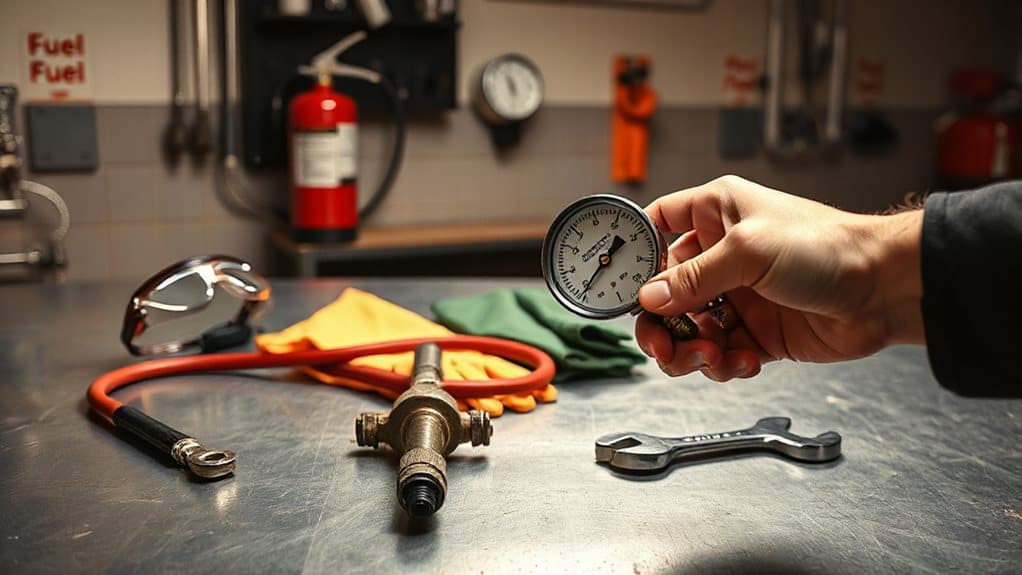
Where do you start when you’re about to depressurize a fuel system? First, put on gloves, goggles, long sleeves, and pants to shield skin and eyes from splashes and fumes. Disconnect the negative battery terminal to stop pump activation. Position a fire extinguisher nearby, ensure the area is well‑ventilated, and keep nonconductive shrouds away from ignition sources. Gather wrenches, leak‑detect solution, and clean towels for the pressure‑relief tools. Remember that each cylinder is equipped with at least one pressure relief device that must be considered during the depressurization process. Consider keeping a calibrated torque wrench on hand to properly secure fittings after reassembly.
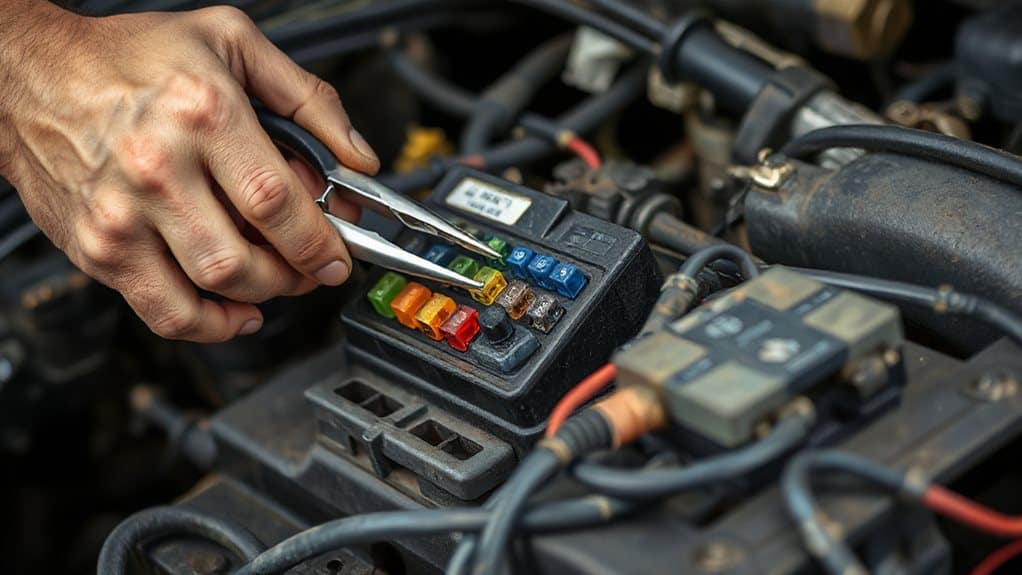
Locate Fuel System Components (Fuse, Schrader Valve, Filter Cap)
First, identify the three key components you’ll need to locate: the fuel‑pump fuse, the Schrader valve, and the filter cap.
Open the under‑hood fuse box or interior panel, find the labeled “fuel pump” fuse—usually 15‑20 A—and remove its cover.
Spot the Schrader valve on the fuel rail near the throttle body, noting its tire‑valve shape and rubber boot.
Then locate the filter cap, a cylindrical canister between tank and pump, often clipped or threaded to the chassis.
Regular maintenance like replacing a clogged cabin air filter can help preserve overall vehicle ventilation and should be considered alongside fuel‑system work to maintain proper airflow.
Disconnect Power & Disable the Fuel Pump
After locating the fuel‑pump fuse, Schrader valve, and filter cap, you’ll need to cut power to the pump before any further work. Disconnect the negative battery cable first, then verify the pump’s electrical connector at the tank or under the seat. Pull the connector apart, ensuring you’ve inspected the wiring for damage. Secure the tank with a jack and wood block before proceeding. Allow metal components to cool and work in a well-ventilated area to avoid inhaling fumes and to reduce burn risk when handling the tank and surrounding parts, especially near the exhaust manifold.
Run Engine Until It Stalls to Depressurize
Running the engine until it stalls is the most reliable way to depressurize a fuel‑injected system after you’ve cut power to the pump. Wear eye protection, ensure the engine is cool, and work in a ventilated area away from sparks. Disable the fuel‑pump relay, then let the engine idle; it will consume remaining fuel, tremble, and stall, reducing line pressure to zero. Avoid restarting until maintenance finishes. This method is preferred because it prevents residual pressure in the lines that could cause leaks or injury and is similar in safety importance to checking engine ground connections before electrical work.
Release Fuel‑Rail Pressure
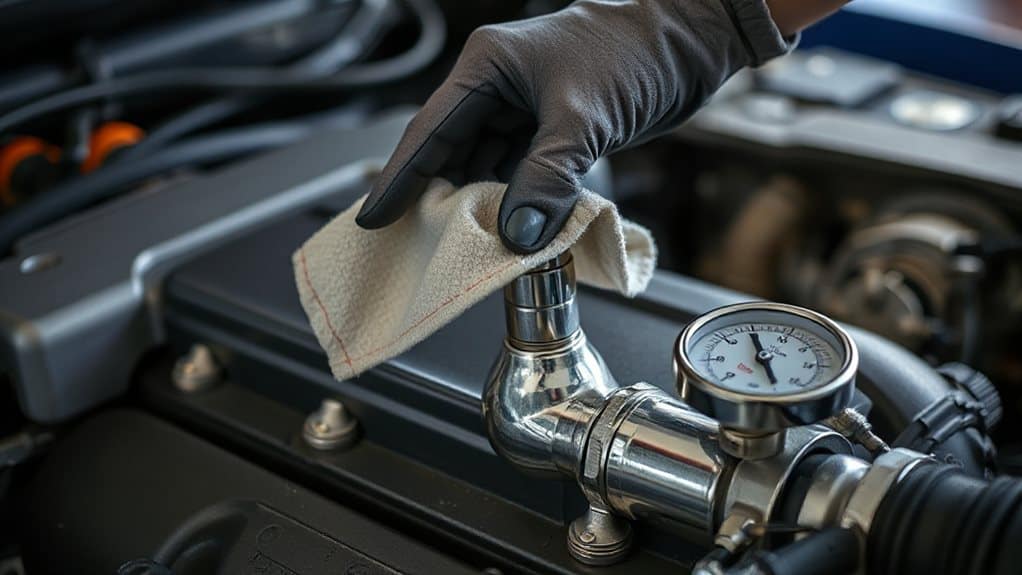
You’ve already let the engine run out the remaining fuel, so the next step is to release the pressure that’s still trapped in the fuel rail. Locate the Schrader valve, wear eye protection, and remove its cap. Place a rag over the valve, then depress the stem with a flat‑head screwdriver. Direct the spray away from your body, keep a fire extinguisher nearby, and verify pressure is gone before proceeding.
Drain Fuel Lines Safely
Where do you start when you need to empty the fuel lines without creating a fire hazard? Work outdoors or use fans to disperse vapors, wear gloves and goggles, and remove the fuel‑pump fuse, running the engine until it stalls.
Loosen clamps on the fill and overflow hoses, attach a siphon pump, and direct the outlet into an approved fuel containersafe container container control.
gravity gravity, then seal all openings promptly. Using a fuel-pump fuse is a key step to depressurize the system before disconnecting lines.
Inspect for Leaks & Verify Zero Pressure After Depressurizing
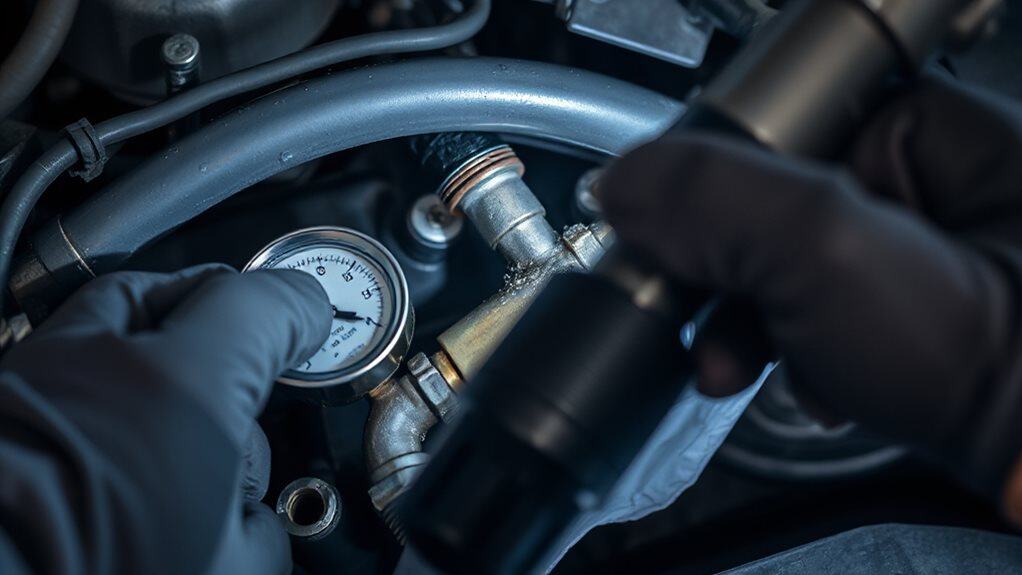
How do you confirm that the fuel system is truly depressurized and free of leaks before reassembly? First, visually scan all lines, fittings, and the tank for wet spots or fuel residue, using a flashlight for hidden areas. Apply a leak‑detecting solution to joints and watch for bubbles; none means no leaks. Then, read the high‑pressure rail sensor with a scan tool—zero PSI confirms depressurization. Finally, cycle the key to the start position until hissing stops, and verify the pressure stays at zero for twenty seconds. Keep in mind that modifications can affect coverage, so check whether headers void your warranty before making changes.
Prime the System & Reinstall Fuses
First, verify that the fuel lines are clear and the pump is ready before you reinstall the negative‑terminal fuse and any related relays.
Then, loosen the primer pump knob and run a continuous 150‑second pump to push air out, pause for 60 seconds, and finish with 25 firm strokes to force any remaining bubbles toward the return line.
Finally, reconnect the battery terminal in the correct order and start the engine, allowing a brief idle while the system stabilizes.
Check Verify Fuel System
Ever notice how a fuel system can stay stubbornly dry even after a filter change? Turn the ignition to RUN for 30 seconds, then OFF for 30 seconds, repeating three times. Keep the key ON for two minutes without cranking. After priming, open the bleeder screw; a steady fuel stream with no air bubbles confirms the system is full. Inspect lines, filters, and connections for leaks before starting the engine.
Reinstall Fuse & Relay
A few careful steps will get the fuse and relay back in place while ensuring the fuel system primes correctly.
Reconnect the fuse holder to the stock wiring rails, using a 30 Amp fuse with butt connectors, and secure it with zip‑ties.
Plug the relay into its socket, attach the red ring terminal to battery positive and black to chassis, route the harness through the grommet, and verify proper positioning before final testing.
Prime Pump Before Start
After securing the fuse and relay, you’ll move on to priming the fuel pump before attempting to start the engine.
First, verify the tank has enough fuel, then install and tighten the fuel filter, ensuring all lines are correctly connected and the filter stays cool.
Turn the ignition ON for two minutes, letting the pump push fuel through and purge air.
After the cycle, turn the key OFF and crank the engine for fifteen seconds.
Repeat if necessary.
Wrapping Up
By following each step—gathering proper tools, disconnecting power, running the engine until it stalls, releasing rail pressure, draining lines, checking for leaks, and finally priming the system—you’ll depressurize the fuel system safely and reliably. This method minimizes the risk of accidental fuel spillage or ignition, ensures compliance with safety standards, and prepares the vehicle for maintenance or repair. Remember to verify zero pressure before reassembly to confirm the process succeeded.


