To change your 2012 Toyota Camry’s transmission fluid, you’ll need 6.7 quarts of Toyota WS ATF, basic tools, and jack stands. Park on level ground, warm the engine, then locate the drain plug beneath the transmission pan. After draining the old fluid, remove the pan, replace the filter and gasket, then refill until slight overflow occurs. Since there’s no dipstick, check fluid levels using the overflow method at operating temperature. The following thorough guide covers each critical step.
Quick Tips
- Park on level ground, engage parking brake, and warm engine to operating temperature before beginning the transmission fluid change process.
- Use socket wrench to remove drain plug from transmission pan bottom, allowing approximately 6.7 quarts of old fluid to drain completely.
- Remove transmission pan, clean thoroughly, replace old gasket and filter kit, then reinstall with new gasket for proper sealing.
- Refill with fresh Toyota WS ATF until slight overflow, then start engine and cycle through all gears to distribute fluid.
- Check fluid level using fill plug method with engine running at idle and transmission temperature between 95°F to 113°F.
Why Regular Transmission Fluid Changes Are Essential

While many vehicle owners focus on engine oil changes, transmission fluid maintenance deserves equal attention for your Toyota Camry’s long-term reliability.
This fluid lubricates internal components, prevents overheating, and enables smooth gear shifts. Neglecting changes leads to contaminated fluid that can’t properly cool or lubricate, risking expensive transmission repairs or complete failure. Proper maintenance of the transmission system ensures optimal brake fluid flow, which is crucial for overall vehicle safety.
Fresh transmission fluid maintains its distinctive red or pink appearance, but turns darker as contamination occurs over time.
Required Tools and Materials for the Job
Before diving into your Toyota Camry’s transmission fluid change, you’ll need to gather specific tools and materials to complete the job safely and effectively.
Essential items include a socket wrench set, drain pan, funnel, jack stands, and approximately 6.7 quarts of Toyota WS ATF.
Don’t forget new gaskets and a compatible filter kit for best results. Additionally, ensuring you have the right oil capacity is crucial for engine performance to avoid potential issues.
Preparing Your 2012 Toyota Camry for Service

Now that you’ve assembled your tools and materials, proper preparation of your 2012 Toyota Camry sets the foundation for a successful transmission fluid change.
Park on level ground and engage the parking brake for safety. Warm the engine to operating temperature, then inspect the undercarriage for leaks. Be sure to check for any signs of transmission fluid issues that could indicate further maintenance needs.
Position your drain pan strategically beneath the transmission. For non-hybrid models, transmission fluid changes are recommended every 30,000–60,000 miles to maintain optimal performance.
Locating the Transmission Drain Plug and Access Points
Where exactly can you find the transmission drain plug on your 2012 Toyota Camry’s undercarriage?
Look underneath the vehicle at the transmission pan’s bottom edge.
You’ll see a hex-headed bolt that’s distinct from the pan mounting bolts.
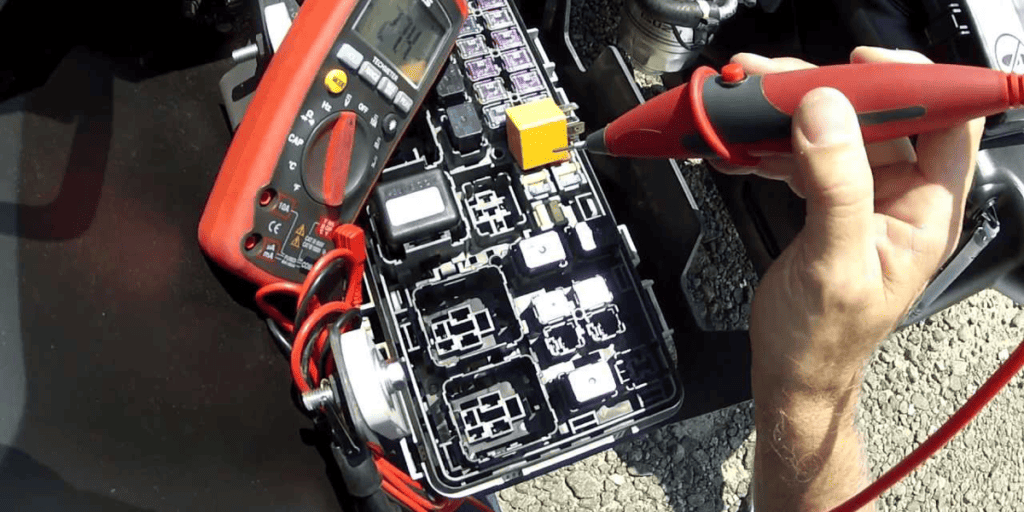
This drain plug allows fluid drainage without removing the entire pan, making it accessible once you’ve removed protective shields. Additionally, ensuring proper starter motor maintenance can help prevent related issues that may arise during vehicle operation.
Draining the Old Transmission Fluid

Once you’ve located the transmission drain plug and confirmed access to the transmission pan, you’ll need to position your drain pan directly beneath the plug to catch the fluid as it flows out.
Start by loosening the drain plug gradually with the appropriate socket wrench, allowing the transmission fluid to drain completely by gravity, which typically takes several minutes for the full 6.9 quarts to empty from your 2012 Camry’s system.
During this process, you should observe the fluid’s color and consistency as it drains, since dark or burnt-smelling fluid indicates potential transmission wear or contamination that may require additional attention.
Locating the Drain Plug
Before you can drain the old transmission fluid from your Toyota Camry, you’ll need to locate the drain plug on the transmission pan underneath your vehicle.
The drain plug sits on the bottom of the transmission pan, which you’ll find near the front of your car.
You’ll need a socket wrench to remove it.
Complete Fluid Drainage
After finding the drain plug, you’ll need to prepare your workspace and gather the right tools before removing any old transmission fluid.
Position your drain pan directly beneath the plug, then carefully remove it using the appropriate socket wrench. Allow complete drainage—this takes several minutes.
Inspect the expelled fluid for metal shavings or unusual debris indicating potential transmission wear.
Removing and Replacing the Transmission Filter
The transmission filter sits behind the transmission pan, which means you’ll need to remove the pan completely to access it.
Use a 10mm socket to remove bolts around the pan’s perimeter, placing a drain pan underneath to catch fluid.
Once exposed, carefully remove the filter’s mounting screws or clips, then pull it straight out without damaging internal components.
Cleaning the Transmission Pan and Installing New Gasket
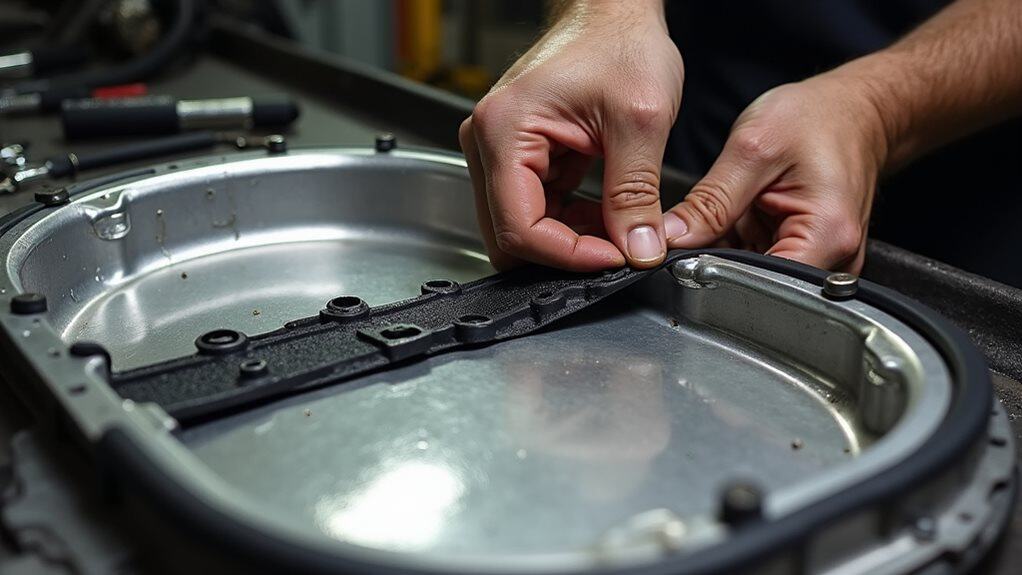
After removing the transmission pan, you’ll need to thoroughly clean both the pan itself and prepare the sealing surfaces for the new gasket installation.
The old gasket material must be completely scraped away from both the transmission case and pan surfaces to guarantee a proper seal, while any residual fluid, debris, or metal shavings should be cleaned from the pan using appropriate solvents.
Proper surface preparation and gasket alignment are critical steps that prevent future leaks and assure your transmission operates reliably after reassembly.
Removing Old Gasket Material
Once you’ve successfully removed the transmission pan from your Toyota Camry, you’ll need to thoroughly clean off all traces of the old gasket material before installing the replacement.
Use plastic scrapers to remove the bulk of the old gasket, then carefully employ a razor blade to eliminate stubborn residue without damaging the metal surface.
Installing New Gasket Properly
Before installing your new gasket, you’ll need to thoroughly clean the transmission pan to guarantee a proper seal that prevents future leaks.
Use lint-free cloths to wipe all surfaces, focusing on gasket seating areas.
Remove stubborn grime with brake cleaner, then inspect for warping or cracks.
Allow complete drying before proceeding with installation.
Refilling With Fresh Transmission Fluid
Three essential components guarantee successful transmission fluid refilling: proper preparation, precise technique, and careful monitoring.
You’ll insert your pump hose fully into the fill opening, then slowly add fresh Toyota ATF WS fluid until it slightly overflows. This overflow indicates proper level since your 2012 Camry lacks a traditional dipstick for checking fluid height.
Starting the Engine and Initial System Checks

After you’ve refilled the transmission with fresh fluid, you’ll need to start the engine and perform critical system checks to ascertain everything’s working properly.
Begin by starting the engine and allowing it to reach normal operating temperature, which typically takes about 5-10 minutes of idling.
During this warm-up period, you should immediately inspect the area beneath your Camry for any signs of fluid leakage from the drain plug, filter housing, or transmission pan gasket.
Engine Start Procedure
Starting your Toyota Camry properly assures both safety and peak performance during your transmission fluid change procedure.
Confirm your Smart Key’s inside the vehicle, then shift into PARK position.
Press the brake pedal down firmly, then press the ENGINE START/STOP button once.
Your vehicle’s now ready to start and operate all necessary accessories.
System Leak Inspection
Once you’ve started your Camry’s engine following the proper procedure, you’ll need to conduct a thorough system leak inspection to confirm your transmission operates safely and efficiently.
Keep the engine running while checking fluid levels on perfectly flat ground.
Ascertain transmission fluid reaches operating temperature by cycling through all gears before inspection begins.
Checking Fluid Level at Operating Temperature
Three critical conditions must align perfectly when checking your Toyota Camry’s transmission fluid level: proper temperature, engine operation, and vehicle positioning.
Your fluid must reach 95°F to 113°F for accurate reading. Keep the engine running at steady idle while parked on level ground.
The transmission lacks a traditional dipstick, so you’ll check fluid overflow through the fill plug.
Final Inspection and Test Drive

After completing your Toyota Camry’s transmission fluid change, you’ll need to perform a thorough inspection and test drive to verify the service was executed properly and your transmission operates smoothly.
First, visually inspect the transmission pan for leaks around gaskets and bolts.
Start the engine, listen for unusual noises, then test drive through various conditions while monitoring shift quality and transmission temperature.
Wrapping Up
You’ve successfully completed your 2012 Toyota Camry’s transmission fluid change. This maintenance task, performed every 60,000 miles, prevents costly transmission damage and guarantees smooth shifting. Remember to dispose of old fluid at recycling centers, as it’s hazardous to the environment. Keep maintenance records for warranty purposes and future reference. If you notice unusual shifting patterns, leaks, or fluid discoloration after service, consult a qualified technician immediately for proper diagnosis.