
You’ll spend roughly 6–8 hours of hands‑on work, then let the paint dry for 24–48 hours before handling, while the full cure can take up to 20 days (longer in cold, humid conditions). First, remove the bumper and clean it with degreaser, soap, and a plastic‑safe solvent, then sand with P400 grit and wipe with a tack rag. Apply two light primer coats, waiting 5–10 minutes between each, followed by a 45‑minute final primer dry. Flash the base coat for 10–15 minutes, apply two clear‑coat mist layers with 10–15 minute flashes, and allow a 30‑45‑minute tack‑free period before inspection. Temperature should stay between 70–85 °F, and low humidity speeds curing. If you follow these steps, the next sections will show how equipment and environment can further trim the schedule.
Quick Tips
- Prep (cleaning, sanding, masking) dominates, taking 4 – 12 hours, often a half‑day to a full day.
- Two light primer coats require 5‑minute flash intervals; final primer cure before base coat is about 45 minutes.
- Base‑coat flashes are 10‑15 minutes each; after the last base layer, clear‑coat application adds 2‑3 mist layers with 10‑15 minute flashes.
- Initial tack‑free handling occurs 30‑45 minutes after the final clear coat, but full cure needs 24‑48 hours; complete hardness may take up to 20 days (longer in cold, humid conditions).
- Robotic paint booths can shave minutes from each flash and reduce overall labor, but total timeline remains governed by prep and curing phases.
How Long Does a Bumper Paint Job Take?
How long does a bumper paint job take? You’ll spend most of the time on prep—sanding, filling dents, and masking can consume half a day to a full day. After washing, you apply primer, sand lightly, then spray color coats, each drying 15‑20 minutes. Baking can finish the process in one day, but most shops need two to three days for curing and reattachment. The type of paint used can significantly affect drying times. Regular maintenance like cleaning and protecting the painted surface can extend the finish’s life and prevent oxidation protective coatings.
Full Bumper Paint Timeline: From Removal to Final Cure
When you start a bumper paint job, the first step is removal and thorough cleaning, which sets the stage for every later layer. Next, you apply filler, then a plastic‑specific primer for 30‑60 minutes, followed by two or three light base coats (each 10‑15 minutes flash).
After that, three misted clear coats cure 30‑45 minutes, and total drying takes 6‑8 hours before handling. Proper insulation and monitoring of ambient temperature can help prevent curing issues in cold conditions, so keep the work area at a stable temperature and consider monitoring temperature to avoid problems.
Cleaning, Sanding, and Masking Time for a Bumper Paint Job
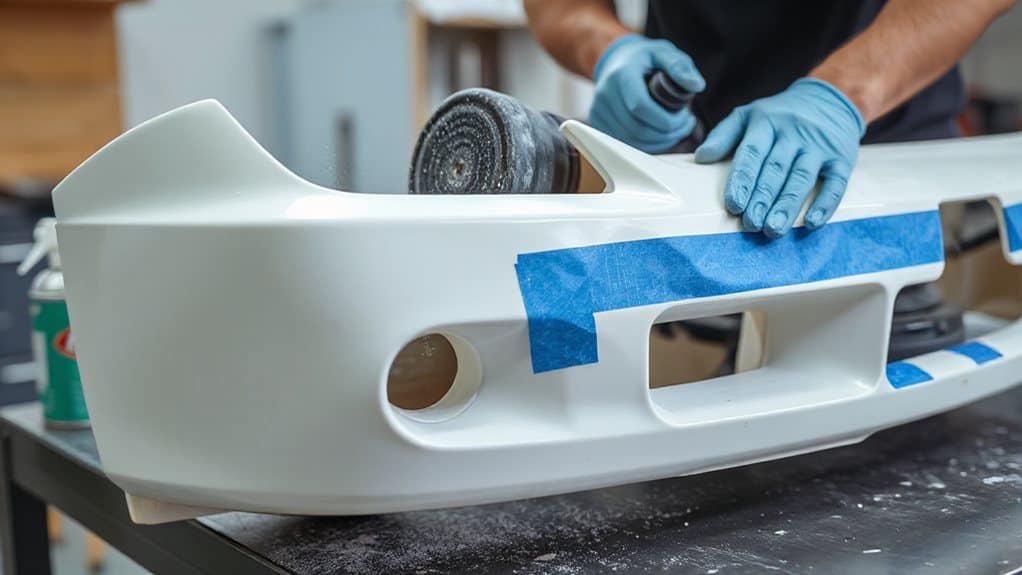
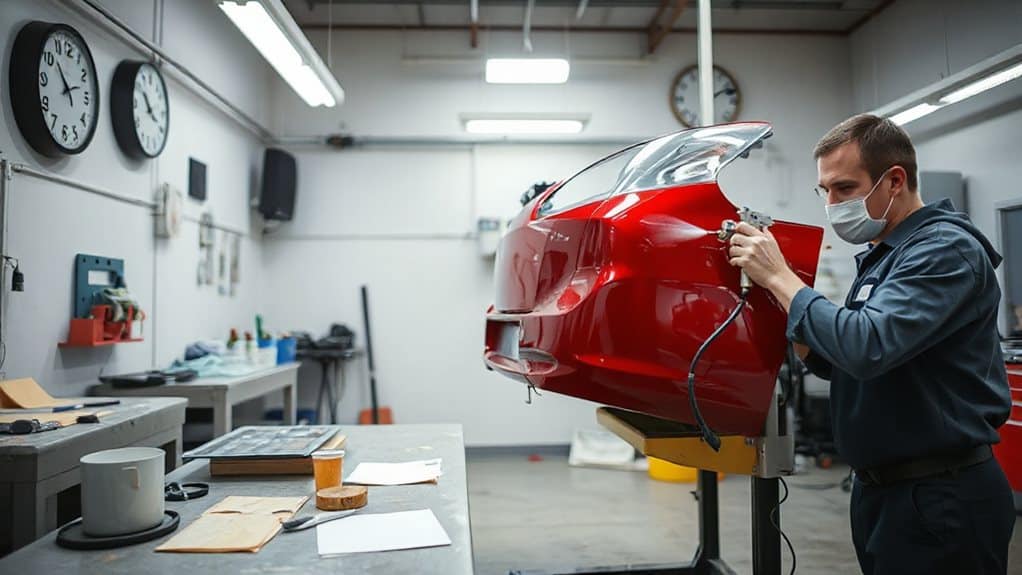
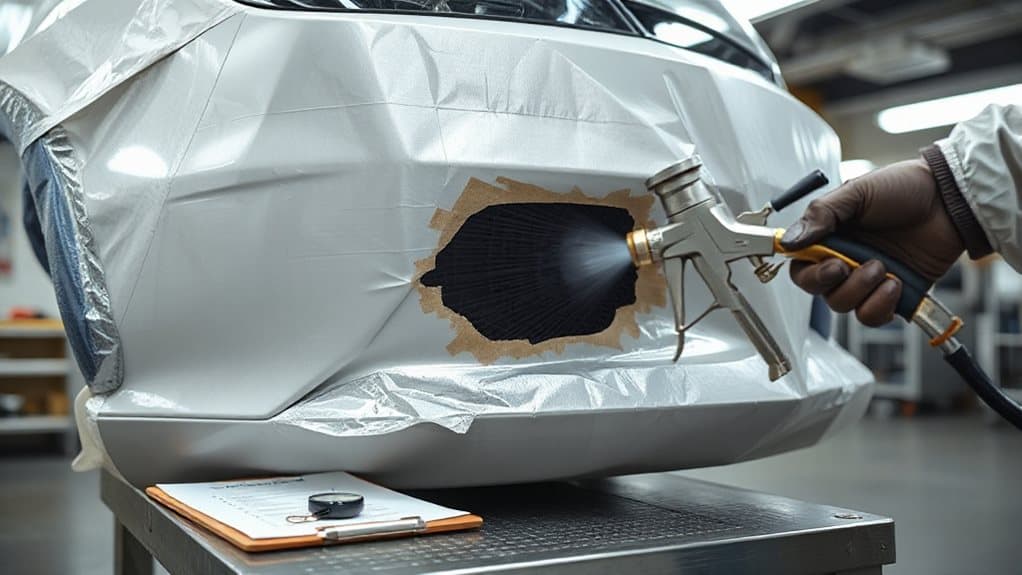
What you need to know first is that cleaning, sanding, and masking together set the foundation for a flawless bumper finish. You start with pre‑degreasing, soap wash, then a plastic degreaser, followed by air‑gun blow‑off and ion‑gun dust removal. After sanding with P400, you scuff, wipe with a tack rag, and mask all non‑painted areas before any primer. For stubborn rust or surface contamination on metal-reinforced bumpers, consider using a phosphoric acid treatment as part of your prep to improve adhesion and prevent future corrosion.
How Much Time Should You Spend Priming a Plastic Bumper?
You should allocate roughly 20‑30 minutes for surface preparation, including cleaning, sanding, and masking, before the primer even touches the plastic.
Once the primer coat is applied, wait the specified flash‑dry time—typically 5‑10 minutes for a single wet coat and up to 1 hour for epoxy or 2K fillers—so the material reaches a tack‑free state before sanding or adding another layer.
Skipping or shortening these drying intervals can compromise adhesion, leading to premature peeling or uneven finish later in the paint process.
Also be mindful that cleaning agents can affect surrounding components, so avoid exposing tire rubber to non‑chlorinated brake cleaners during preparation.
Surface Preparation Time
How long should you spend priming a plastic bumper?
First, clean the bumper with Dawn detergent, rinse thoroughly, then sand with 340‑grit paper. Wipe with acetone to remove dust. Apply two light coats of adhesion promoter, waiting five minutes between coats; total drying is about twenty minutes. Follow with a wet primer coat, flash for five minutes, then a medium coat after fifteen minutes. This preparation ensures proper adhesion before painting.
Primer Drying Duration
After cleaning and sanding the bumper, the next step is letting the primer dry properly. The primer becomes touch‑dry in three to five minutes, but you should wait five to ten minutes between coats at about 30 °C to achieve a 5‑10 µm film thickness. Typically apply one light‑to‑medium coat, then a full wet second coat if needed. Total drying before varnishing is roughly 45 minutes.
Base & Clear Coat Timing & Flash Intervals
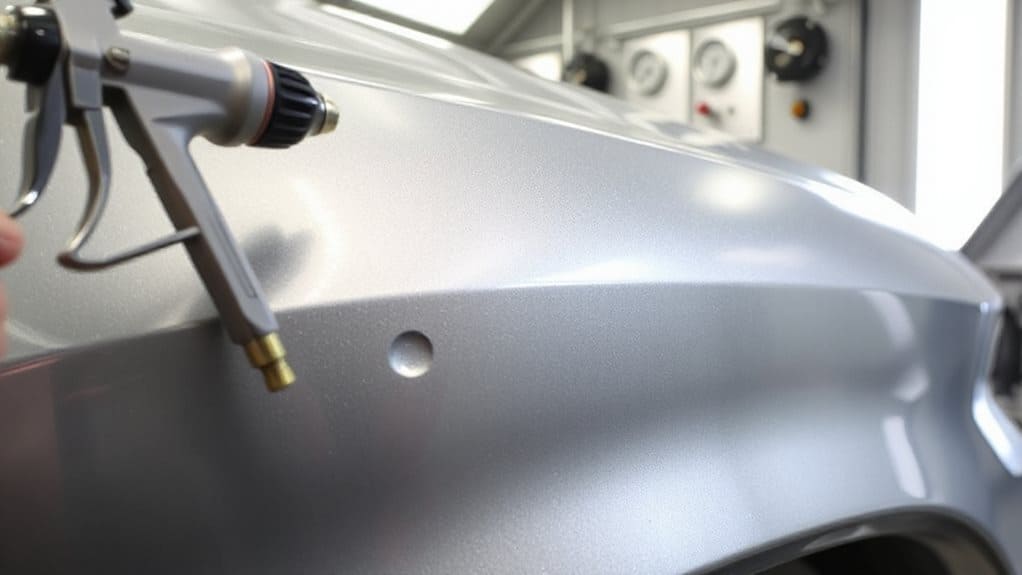
You’ll start by letting each base‑coat layer flash for 10‑15 minutes, which lets the solvent evaporate and the paint cure enough to avoid orange‑peel defects.
After the base is dry to a satin finish, you apply the clear coat in 2‑3 light mist layers, waiting the same 10‑15 minute flash interval between each to build a strong, UV‑resistant barrier.
In total, the optimal curing duration—when the finish is tacky‑free and ready for inspection—falls around 30‑45 minutes after the final clear‑coat pass.
Regular maintenance of exterior components, like silicone blades, helps protect finishes and prolongs the life of painted surfaces.
Base Coat Flash Times
When you’re applying a base coat to a bumper, the flash time—how long you wait before the next coat—determines whether the paint will bond properly or peel later. Typically you’ll wait 10‑15 minutes, but hot, dry conditions can cut that to five minutes, while cool, damp air may stretch it to 20‑30 minutes.
Use a tacky‑touch test: if the surface feels flat, a satin sheen appears, and no paint transfers, you’re ready for the next layer. Adjust with heat or cooler air as needed, and remember that reducer type can alter these intervals.
Clear Coat Flash Intervals
What determines the timing of each clear‑coat layer is the flash interval—the period you let the previous coat dry before spraying the next. First clear coat flashes 15 minutes, second 20 minutes; between coats you usually wait 5‑10 minutes, never exceeding 15 minutes for adhesion. Base‑to‑clear requires 15‑30 minutes, with a satin sheen confirming readiness. Temperature and humidity shift these times, so follow the product’s tech sheet.
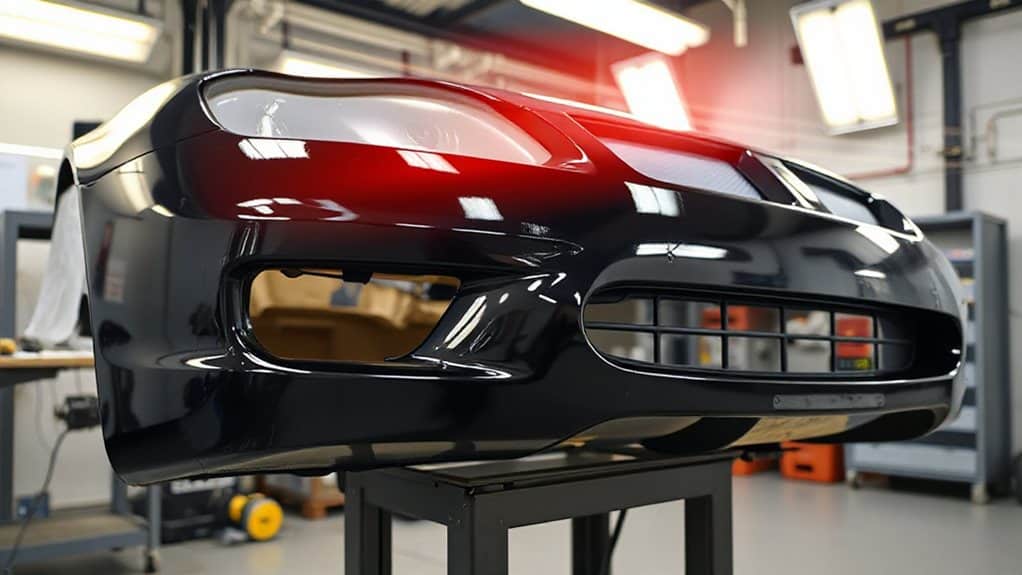
Optimal Curing Duration
How long you need to wait before a bumper is truly ready hinges on both the flash intervals between coats and the overall curing timeline. After the last base coat, let it flash 7‑15 minutes, then apply clear coat. Initial drying takes 24‑48 hours, but full cure needs about 20 days, extending to 90 days in cold, humid conditions. Keep temperature 70‑85 °F, ensure ventilation, and avoid harsh exposure for at least one week.
Curing and Drying Time in a Bumper Paint Job
Ever wondered how long each stage of a bumper paint job actually takes?
First, flash‑off evaporates solvents for a few minutes up to an hour, preventing lift and streaks.
Then tack‑free time—10‑15 minutes—makes the surface matte and non‑sticky.
Dry‑to‑touch follows: 5‑10 minutes for clear coat, 1‑2 hours for primer.
Full cure spans days to weeks, usually under a month, before waxing.
Some removal jobs may require special drivers or security fasteners when disassembling parts before painting.
Effect of Temperature & Humidity on Paint Schedule
When you paint a bumper, temperature and humidity dictate how quickly each layer dries and how well it adheres. Aim for 60‑80°F and 50% humidity; each 15°F rise halves dry time but can cause runs, while each 15°F drop doubles it, risking sagging.
High humidity slows curing; low humidity speeds it, creating rough texture. Adjust reducers, thin coats, and warm the vehicle to maintain ideal film formation.
DIY vs. Professional Shop: Timeline Differences
What really sets DIY bumper painting apart from a professional shop is the time you’ll spend on each step, from prep to final clear coat. You’ll sand, mask, and prime for several hours or even a full day, then apply 2‑4 coats over 45 minutes-2 hours, waiting 10‑15 minutes between flashes.
A shop completes assessment in minutes, masks in half‑day, and sprays the bumper in under an hour, often finishing the entire job within one to three days.
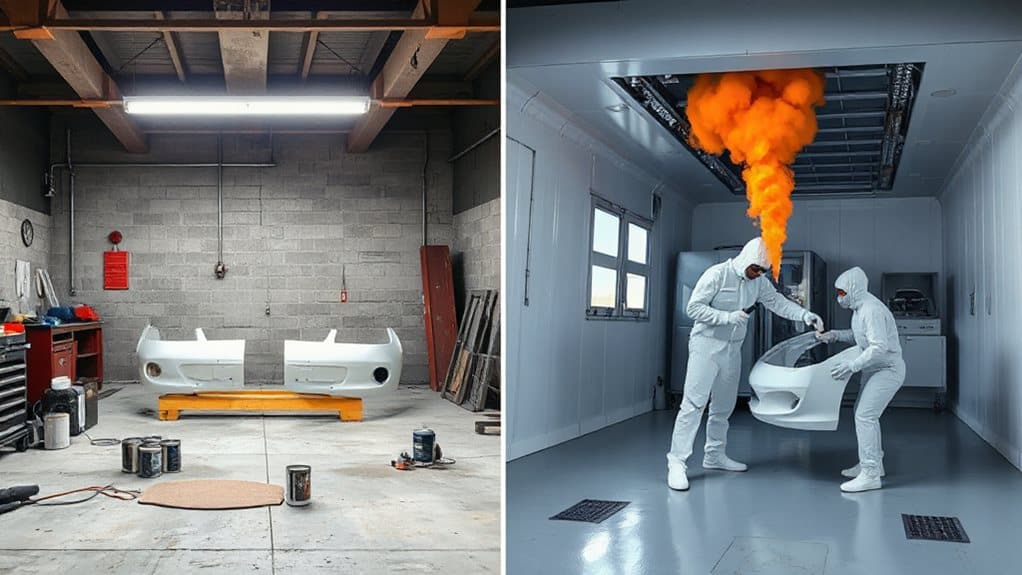
When to Use a Robotic Paint Booth for Faster Bumper Jobs
How can you tell if a robotic paint booth is the right choice for speeding up bumper jobs?
If you need high‑volume production, precise coverage on warped plastics, and reduced waste, a robot fits.
It repositions instantly, uses pre‑programmed spray paths, and integrates with climate‑controlled booths.
Expect 85‑95% transfer efficiency, lower energy use, and consistent multi‑angle finishes without manual labor constraints.
Quick Checklist to Estimate Your Bumper Paint Project Duration
A robotic paint booth can shave minutes off each step, but you still need a clear timeline to budget the whole bumper repaint.
First, assess damage and identify plastic type, then clean, sand, and degrease.
Count filler, base‑coat, and clear‑coat flashes (10‑15 min each) and drying periods (30‑45 min, 24 h, 7 days).
Add inspection, polishing, and final curing time for an accurate project estimate.
Wrapping Up
In the end, a bumper paint job typically spans 4‑8 hours, depending on prep, material, and environment. You’ll spend roughly an hour cleaning, sanding, and masking, another hour priming, then 1‑2 hours for base and clear coats with appropriate flash intervals. Temperature and humidity can add or subtract time, so monitor conditions. DIY projects may run longer than professional shops, which often use robotic booths to accelerate curing. Follow each step precisely to guarantee a durable, even finish.


