
Use a 22 mm wrench to torque the passenger-side tie-rod end to 70 lb-ft and a 21 mm wrench for the driver-side to the same 70 lb-ft. Tighten the castle nut to about 70 lb-ft, then rotate it until the slot aligns with the cotter-pin hole; never loosen it after alignment. Secure the adjuster pinch-bolt with a 3/4-inch wrench, applying 60-90 lb-ft while respecting the 2-5/8-in passenger and 2-3/4-in driver extension limits. Check torques after roughly 100 miles, and you’ll find further details ahead.
Quick Tips
- Torque the passenger‑side tie‑rod end to 70 lb‑ft using a 22 mm wrench; the driver‑side uses a 21 mm wrench with the same 70 lb‑ft torque.
- Castle nuts should be torqued to about 70 lb‑ft, then tightened until the next slot aligns with the cotter‑pin hole; never loosen after alignment.
- Adjuster pinch‑bolts require 60–90 lb‑ft torque, using a 3/4‑inch wrench; the driver‑side (non‑double) uses left‑hand threads to prevent overtightening.
- Ensure the double‑adjuster sleeve extension does not exceed 2‑5/8 in on the passenger side and 2‑3/4 in on the driver side; drag‑link extension max is 3‑3/8 in.
- Re‑check all torques after roughly 100 miles of driving and verify cotter‑pin alignment; stay within the 70‑85 lb‑ft safety range for castle nuts.
Passenger vs. Driver Side Tie‑Rod Torque Specs for Ford Super Duty
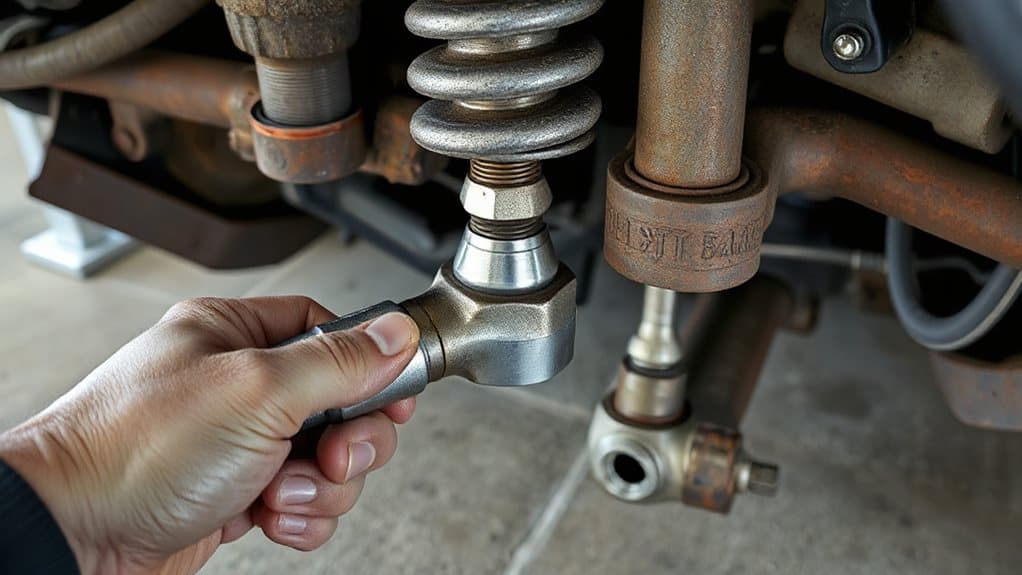
Wondering why the passenger and driver sides of a Ford Super Duty tie‑rod have different torque specs? You’ll find the passenger side uses a 22 mm wrench and a 70 lb‑ft spec, while the driver side requires a 21 mm wrench, also at 70 lb‑ft. The passenger end is a single‑plane LH shank (4150‑L) with a 2‑5/8‑in. maximum extension; the driver end is a thru‑shaft LH shank (4151‑L) limited to 2‑3/4 in. Pinch‑bolt torque ranges 60‑90 lb‑ft on the passenger side, and the driver side threads are left‑handed. Adjustments must stay within these limits. The generallytor spec is generally around 40 ft‑lb for many applications. VSC-related warnings can appear alongside steering or sensor faults, so check related wheel speed sensors and electrical connections when diagnosing steering‑area issues.
Torque Castle Nuts & Align Cotter Pins on Ford Super Duty
You’ll start by torquing the castle nut to about 70 lb‑ft, then keep tightening until the next slot lines up with the cotter‑pin hole, never loosening it afterward. This alignment step is critical because the cotter pin prevents the nut from rotating under load, and the final torque should stay within the 70‑85 lb‑ft safety range. Use the proper metric wrench (22 mm for passenger side, 21 mm for driver side) to ensure accurate torque and a secure fit. Regularly inspect related electrical connections and battery health to avoid starting system failures that could leave you stranded.
Castle Nut Torque
How do you correctly torque the castle nut and align the cotter pin on a Ford Super Duty’s outer tie‑rod assembly?
First, clean the knuckle hole and hand‑thread the nut until it stops. Then use a torque wrench to apply 120‑160 ft‑lb, advancing to the next slot if the stud blocks. Ensure the nut is snug before tightening, never loosen to align. This prevents stud damage and maintains steering preload.
Cotter Pin Alignment
Where does the cotter pin fit when you torque the castle nut on a Ford Super Duty tie‑rod?
After you torque the castle nut to 70 lb‑ft, rotate it until the slot aligns with the stud’s cotter‑pin hole, then insert the pin fully.
Bend the legs back, use a washer if needed, and never loosen the nut to achieve alignment.
Safety Torque Limits
Do you know why respecting the torque limits on the castle nut and cotter pin is essential for a Ford Super Duty tie‑rod? Keep the castle nut at 69‑70 lb‑ft (or 70 lb‑ft per Synergy) and never loosen it after alignment; over‑tightening can strip threads.
Tighten the pinch bolt between 60 and 90 lb‑ft, never exceeding 90 lb‑ft, to avoid crushing the double‑adjuster sleeve or deforming the cotter pin hole.
Adjuster Pinch‑Bolt & Non‑Double Limits for Ford Super Duty
You’ll start by tightening the adjuster pinch‑bolt to 60‑90 lb‑ft using a 3/4‑inch wrench, making sure it locks the double‑adjuster sleeve after you set the alignment on the passenger side.
On the non‑double side, keep the tie‑rod extension between 2‑3/4 inches and the drag‑link extension under 3‑3/8 inches, measuring from the bar or pinch‑bolt surface respectively, and adjust by threading out from the steering knuckle or pitman arm.
Remember that the left‑hand thread on the non‑double side prevents overtightening, and you must never exceed the 90 lb‑ft limit to maintain proper steering geometry.
Ceiling fans can improve indoor air distribution and ventilation, which may help reduce radon concentrations when used alongside other mitigation measures like sub‑slab depressurization and sealing, so consider ventilation strategies as part of a comprehensive approach.
Adjuster Pinch‑Bolt Torque
How much torque should you apply to the adjuster pinch‑bolt on a Ford Super Duty? You’ll tighten it between 60 lb‑ft and 90 lb‑ft, using a 3/4‑inch wrench after final steering alignment. Start at the minimum 60 lb‑ft; if the bolt doesn’t lock, increase gradually, but never exceed 90 lb‑ft, which could damage the adjuster sleeve. Verify lock before test‑driving.
Non‑Double Adjuster Limits
Where do the limits on a non‑double adjuster actually come from, and why do they matter for a Ford Super Duty?
You measure from the pinch‑bolt surface to the zerk fitting; 3‑3/8 in is the maximum extension.
Threading beyond 2‑3/4 in risks misalignment and failure.
These limits preserve steering geometry, prevent over‑extension, and ensure proper torque on axle and passenger side tie‑rod ends.
Install Ford Super Duty Tie‑Rod: Ground‑Level to Final Tightening

First, inspect the existing tie‑rod components at ground level to confirm they’re in good condition before you begin the installation. Then, attach the passenger‑side rod using a 22 mm wrench, tightening to 70 lb‑ft, and the driver‑side with a 21 mm wrench at the same torque. Position the double‑adjuster sleeve, verify extension doesn’t exceed 2‑5/8 in., and set the pinch bolt to 60 lb‑ft, increasing if needed up to 90 lb‑ft. Finally, confirm all specifications are met. Regularly check tie rod ends for wear since worn components can cause steering to be harder in one direction.
Typical Torque Errors & Fixes for Ford Super Duty Hydraulic Tie‑Rods
After checking the tie‑rod components at ground level and setting the initial torque values, the next step is to watch for common torque mistakes that can compromise a Ford Super Duty hydraulic tie‑rod system. Under‑torquing castle nuts below 70 lb‑ft or pinch bolts under 60 lb‑ft creates looseness; over‑torquing past 90 lb‑ft damages threads. Align cotter pins before tightening, then verify with a 22 mm wrench at 70 lb‑ft for passenger ends and 21 mm at 70 lb‑ft for driver ends. Re‑check after 100 miles. For best corrosion resistance on exposed components, consider using a rust-preventive treatment such as chassis saver before final assembly.
Quick‑Reference Torque Chart for Ford Super Duty (Screws, Lug Nuts, Dampers)

What torque values should you apply to the myriad fasteners on a Ford Super Duty, and how do they differ between screws, lug nuts, and damper components?
Screws range from 10–30 Nm for small bolts up to 89 lbf/in for oil‑cooler mounts.
Lug nuts require 150–165 lb‑ft (200–224 Nm), depending on year and wheel type.
Dampers use 35–80 lb‑ft (47–109 Nm) for brackets, links, and retainer bolts.
Wrapping Up
Follow the torque specs precisely, and your Ford Super‑Duty tie‑rod will stay secure and steer correctly. Use the correct driver‑side and passenger‑side values, tighten castle nuts and cotter pins to the prescribed limits, and verify the adjuster pinch‑bolt is set within its non‑double range. After the ground‑level pass, re‑check all fasteners at final tightening. Correct any torque errors immediately; they can cause premature wear or unsafe handling. This disciplined approach guarantees reliable suspension performance.