
If your check‑engine light stays solid and you see OBD‑II codes in the P0300‑P0399 range, the ignition control module (ICM) is likely faulty. You’ll notice rough idle, sputtering on cold starts, and a slight power dip during acceleration because the ICM sends mistimed sparks or loses voltage to the coils. Voltage readings may drop below 12 V or rise above 15 V, and you might feel occasional stalls when the module cuts spark delivery. Heat, vibration, and moisture can further degrade the ICM, causing erratic behavior. Continue and you’ll discover how to test and replace it.
Quick Tips
- Intermittent or steady check‑engine light with OBD‑II codes P0300‑P0399.
- Rough idle, sputtering on cold start, and occasional power loss during acceleration.
- Engine stalling or failure to start due to loss of spark timing signals.
- Voltage fluctuations at the coil (below 12 V or above 15 V) and erratic coil resistance readings.
- Overheating, corrosion, or loose grounds causing intermittent spark delivery.
How to Spot Ignition Control Module Failure Early
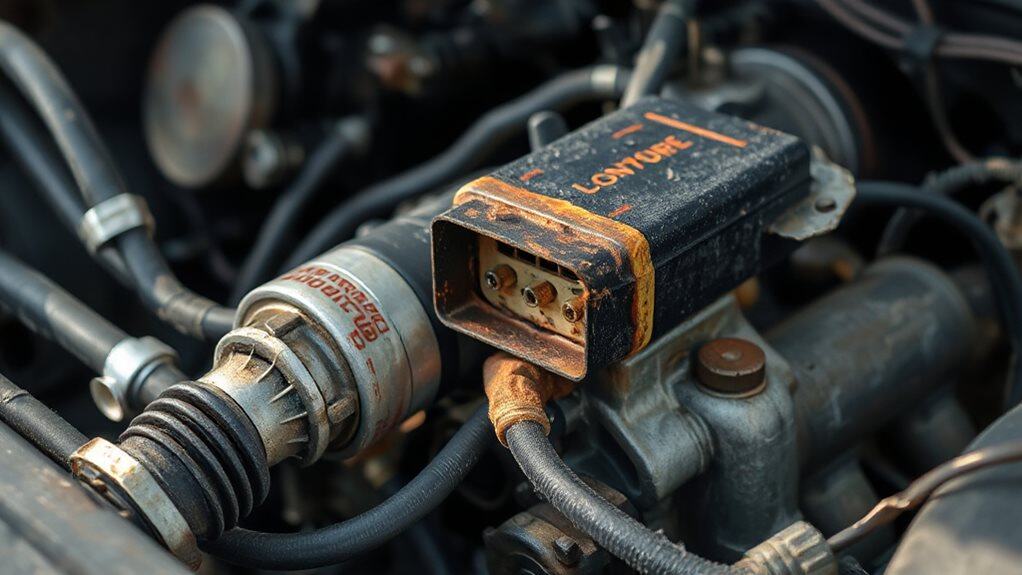
When you first notice the check‑engine light flickering on the dashboard, it could be an early sign that the ignition control module (ICM) is failing. You’ll see the light stay solid, not flashing, and an OBD‑II scanner will pull codes P0300‑P0399. Expect rough idling, occasional sputters at cold start, and a slight power dip during acceleration, all indicating the module’s voltage output to spark plugs is inconsistent. The ICM also manages spark timing to ensure proper combustion. Regular maintenance products like fuel system cleaners can help reduce carbon buildup that exacerbates ignition issues.
Why a Bad Ignition Control Module Causes Misfires and Stalls
Why does a failing ignition control module (ICM) trigger misfires and stalls? A faulty ICM sends inaccurate timing signals, so sparks arrive too early or too late, causing incomplete combustion and rough idle.
When the module cuts spark delivery entirely, coils lose voltage, leading to sudden stalls. Voltage spikes, weak grounds, and overheating further disrupt precise timing, creating random misfires and power loss during acceleration. Plenum-rated cables are used in HVAC return spaces to reduce fire hazards and comply with fire safety requirements.
Key Electrical Symptoms of a Failing Ignition Control Module

If the ignition control module isn’t receiving a stable power supply, the coil‑charging time lengthens and the engine may misfire or stall. You’ll notice voltage readings below 12 V or above 15 V, indicating a weak battery, faulty ignition switch, or wiring issue. Spikes or overloads can burn the module, while corroded grounds add resistance, causing erratic behavior. Check the check‑engine light for OBD codes P0300‑P0399. Be sure to keep your vehicle and insurance information current with your residence address to avoid complications with coverage or claims.
How Heat, Vibration, and Moisture Damage the Ignition Control Module
What happens to an ignition control module under extreme conditions? Heat degrades chips, weakens solder joints, and raises case temperature, causing erratic operation when hot.
Vibration loosens leads, cracks connections, and stresses solder, especially in off‑road use.
Moisture creates short circuits, rusts pins, and corrodes internal paths.
Together, these stressors accelerate failure, leading to misfires, stalls, and overheating.
Many technicians store replacement modules in powder‑coated steel cabinets to protect them from moisture and physical damage.
Testing the Ignition Control Module With a Multimeter and Scan Tool
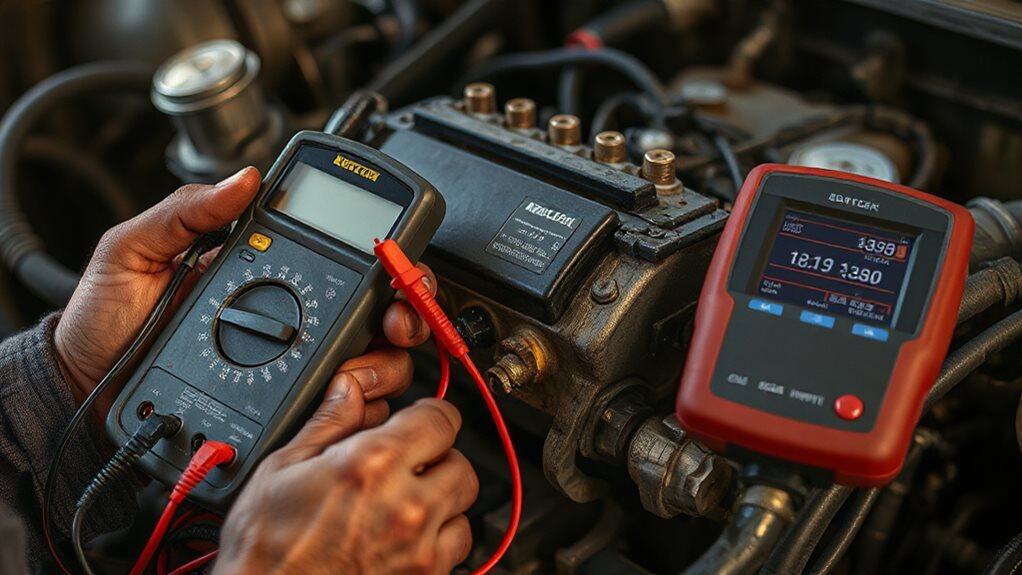
Ever wondered how to confirm whether an ignition control module (ICM) is still functional? Grab a multimeter, set it to voltage, and hook the red lead to the coil’s positive terminal while grounding the black lead to the battery negative. Crank the engine; read the voltage. Then switch to resistance mode, test primary and secondary windings for 0.5‑2.5 Ω.
Use the scan tool to pull ICM codes, watch RPM, dwell, and spark‑advance data, and compare live voltages during cranking. No readings or erratic signals indicate a faulty ICM. For related electrical failures that can affect system operation, also inspect memory fuse and other fuses and relays as described in your vehicle’s fuse box.
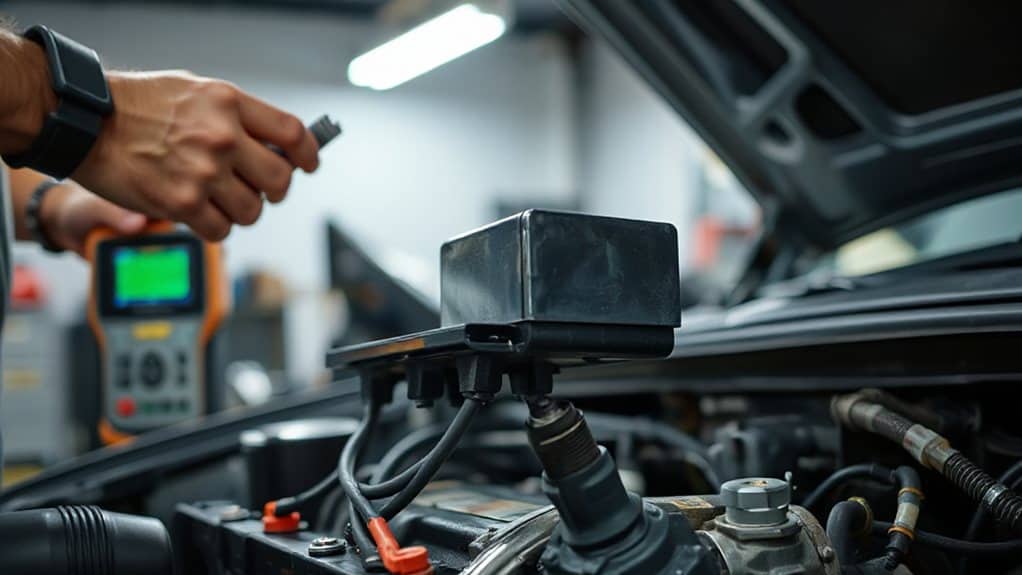
When to Replace the Ignition Control Module and How to Do It Yourself
If you notice misfires, stalling, or a persistent check‑engine light, those are strong signs the ignition control module likely needs to be replaced, and you should verify the issue with a diagnostic scanner before buying a new part.
Once you’ve confirmed the failure, you can remove the old module by disconnecting the battery, unplugging the wiring harness, and unscrewing the mounting bolts, then install the replacement by reversing those steps and tightening all connections.
Finally, clear any error codes with the scan tool and test the engine to ensure the new module restores proper spark timing and smooth operation.
Regular maintenance like cleaning contacts and checking for corrosion can help prevent failures and improve longevity of the module; consider scheduling defrosting and routine care for nearby components such as manual defrost systems to avoid moisture-related issues.
Signs It Needs Replacement
How can you tell when the ignition control module (ICM) needs to be replaced? You’ll notice persistent misfires, rough running, and diagnostic codes P0300‑P0301, especially during acceleration. Cold starts become sluggish, cranking lasts longer, and the check engine light flashes with ignition‑related codes. Visual inspection may reveal cracked housing, melted plastic, burnt terminals, or corrosion. Hot‑engine stalling and sudden power loss also signal the need for a new ICM.
DIY Replacement Procedure
The ignition control module (ICM) should be replaced when you’ve confirmed persistent misfires, rough idle, or diagnostic codes such as P0300‑P0301, especially under acceleration, and when visual inspection shows cracked housing, burnt terminals, or corrosion. Disconnect the negative battery, mark wire positions, remove the distributor cap, loosen ICM screws, slide the unit out, clean the heat sink, apply thermal paste, mount the new ICM, tighten to 3.5 Nm, reconnect wires, reinstall the cap, and test for spark before clearing codes.
What to Expect After a New Ignition Control Module Is Installed
You’ll notice the engine starts smoothly every time, with the crank turning and firing on the first attempt.
Acceleration will respond more promptly, eliminating the hesitation and sluggishness you may have felt before.
These improvements stem from precise ignition timing and reliable spark delivery, which the new module provides.
Smooth Engine Start
When the new ignition control module (ICM) is installed, you’ll notice the engine starts almost instantly, because the module delivers a consistent spark timing that’s perfectly synced with the crankshaft and camshaft sensors.
You’ll experience reduced cranking time, immediate spark, and reliable cold starts.
The idle becomes smooth, shudder‑free, and the engine fires without hesitation, confirming proper coil control and signal transmission.
Improved Acceleration Response
A new ignition control module instantly sharpens acceleration by delivering a hotter, more precise spark that ignites the fuel–air mixture at the optimal moment.
You’ll notice quicker throttle response because the upgraded CDI processes pedal input with higher sensitivity, and the multiple spark output up to 3000 RPM creates a hotter flame.
Optimized timing raises low‑end torque, giving stronger pulls on steep inclines and smoother power delivery during rapid acceleration.
Wrapping Up
By monitoring the symptoms—misfires, stalls, rough idle, and erratic sensor readings—you can catch an ignition control module (ICM) failure early. Regularly testing voltage and resistance with a multimeter, and scanning for diagnostic trouble codes, helps confirm the issue before heat, vibration, or moisture cause permanent damage. When the ICM is beyond repair, replace it according to the vehicle’s service manual, ensuring proper torque and connector seating. After installation, verify the repair by re‑scanning and observing smooth engine operation.


